

Build a Shed Ramp

Build a Shed Ramp
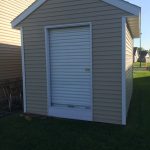
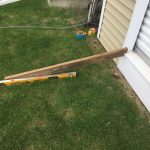
 So you’ve been following our shed series or built one of your own design. Now comes time to load things into it. Unless you buried your shed partially in the ground, the floor may be as much as a foot above grade. A ramp is definitely in order. Read on for how to build a shed ramp for your own structure. The shed shown in this article isn’t the one from our shed series but the ramps are built exactly the same with 2×4 stringers and a cleat but with different dimensions to match the width of the door and the slope of the yard.
What Needs A Ramp
Before you can build a shed ramp, take a little inventory of the things you want to store in your shed. Particularly the things on wheels. Snowblowers, wagons, log splitters, bikes, and lawn mowers are all things you may be considering storing in the shed. Pay special attention to the heavier items or ones with low ground clearance. These items are the ones that will influence the slope of your ramp. If you have a riding lawn mower, the ramp can’t be too steep or the deck of the mower will get hung up at the top of the ramp. Additionally, if you have large flower pots that you want to store in the shed in the winter, you’ll have to pull those up the ramp on a hand truck of some sort. The steeper the shed ramp the more effort it will take to get them up there.
Determine The Slope
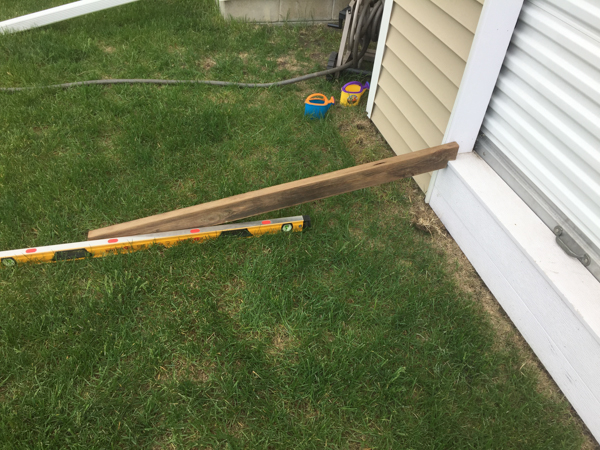
 Now that you have a mental list going of the items that you want to store, it’s time to figure out the slope of the shed ramp that will work for you. Like I mentioned above, riding lawn mowers have a large influence over this decision. Their low ground clearance necessitates a pretty gradual slope. The easiest way to determine a slope is to grab a few pieces of scrape of various whole number lengths. Grab your 4′ level, a 5′ piece of scrap and a 6′ piece of scrap. These lengths are important because they are half of 8′, 10′, and 12′, which are pretty common lengths of treated/cedar lumber. Set these pieces of scrap up to the lip of the shed door, step back, and see how they look. When you find one that seems to offer a gentle slope without sticking too far out into your yard, grab your bevel gauge and set it from the vertical face of the shed to the angle of the ramp slope. You’ll be using this angle in the next few steps.
Get Your Lumber
For me, 5′ was the perfect length of ramp in order to get the right slope. For a ramp like this under 6′ long, 2x4s at 16″ on center are strong enough. Building a 4′ wide ramp at 5′ long means I needed 2 – 2x4x10′ treated boards and 5 – 5/4x6x8 treated decking boards. the decking gets buzzed in half as well as the 2×4 stock. The only other board I used was a 2x2x8′ treated board. Only 4′ is needed so if you can buy it in smaller amounts, do it.
Cut Up The Shed Ramp Lumber
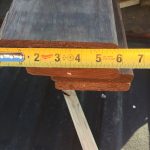
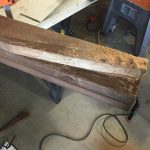
 As I mentioned in the last paragraph, cut all of the boards in half starting with the decking. One thing I did with this shed ramp was measure the moisture content of the decking. It was 40% so I banked on laying the boards tight and as they dried out, they would shrink and give a gap somewhere between 1/8 and 1/4″. Knowing that, I measured the width of a few of the boards and the average width was 5-3/4″. Multiply that by 10 if you have a 5′ ramp, 8 if 4′ ramp, 12 if 6′ ramp. The number you get is the length of the stringers. It will be a little under your whole number measurement but close enough. Use your angle finder to set your miter saw and cut the stringers to length.
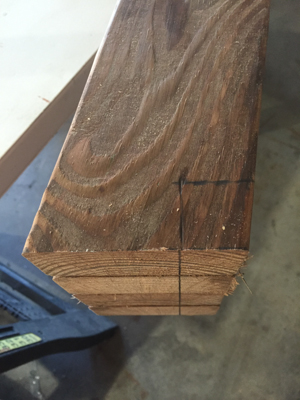
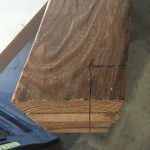
Next notch out an area in the angled end of the stringers that is big enough for the 2×2. It should be a square cut to the angled end. Then take one of the stringers out to the shed, set it roughly in place and lay something straight like a level along the ground and trace a line on the stringer. This will make your ramp sit flat on the ground on the lower end so you don’t have to dig the stringers into the dirt. Cut all the stringers with this angle. Cut the 2×2 in half at this time too.
Scribe a line on the stringer even with the ground and cut with circ saw
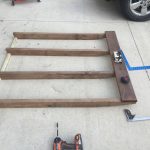
Assemble the Shed Ramp
You’ll need both 3″ and 2″ deck screws for this step. The 3″ are for joining the cleat to the stringers and then the cleat to the shed. The shorter screws are for attaching the decking.
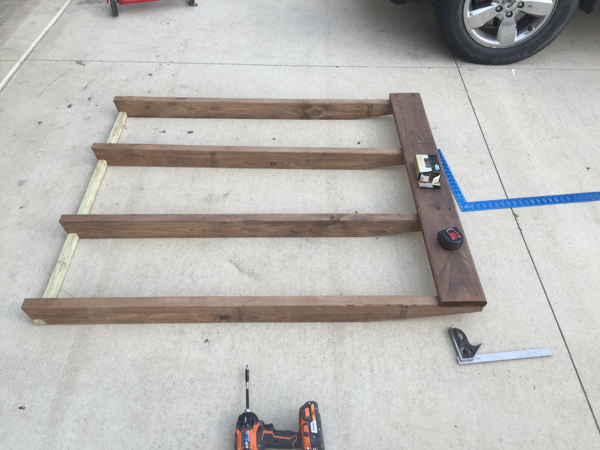
Start by laying out the stringers upside down. Mark and screw the 2×2 cleat to the notch in the stringers. Flip it over, and layout and attach the bottom most deck board. After that’s done, be sure your frame is still square and attach another deck board. Be mindful of the weight of the ramp if you’re assembling it any distance from the shed. If your lumber is anywhere near the moisture content of mine, you’ll have a hard time getting it to the shed if you have too many boards fastened.
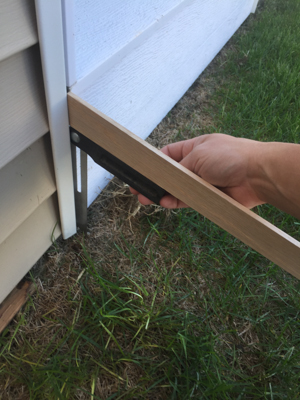
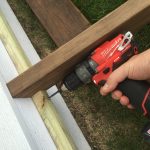
Drag the partially decked ramp back to the shed, prop it up on some scrap boards to get it to the right height, and then screw the cleat into the shed. Check for square again and then start attaching the decking. Check the distance of the decking from the shed from both sides when you have about 4 or 5 courses to go. This way you can adjust and gap any of the boards so that you don’t have a large, slightly skewed gap at the last board.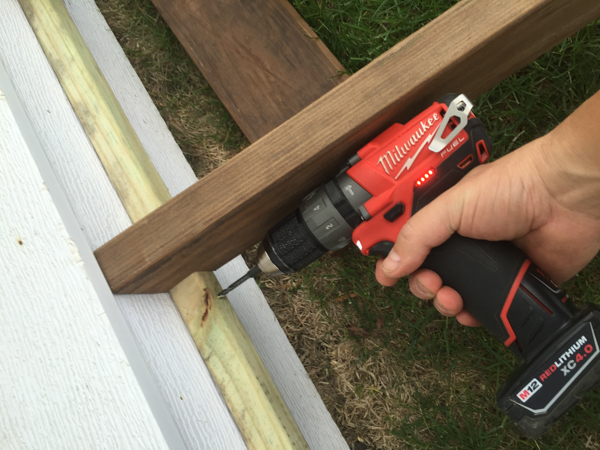
When fastening down the boards I usually place bark side up because it’s the best side of the board. The pith side usually has the pith that weaves in and out of the surface, this material as the wood dries will curl up and out of the board and I’d rather have that hidden. Sometimes the pith side is better looking though and I flip that side up. Fine Homebuilding has a similar stance.


Very informative.Thanks for the updates:)