

How To Build Sliding Barn Door

How To Build Rustic Sliding Barn Door
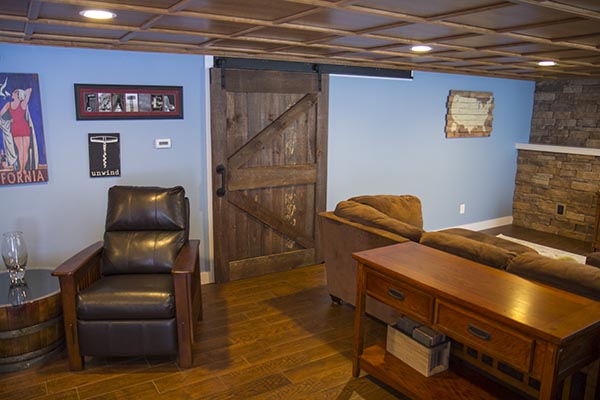
Sliding barn doors are very popular inside home today. These doors add a great aesthetic impact to any room, and they offer a functional solution where traditional swinging doors might be a problem. I recently built a rustic sliding barn door for our finished basement and wanted write this article to show you how to build a sliding barn door.
Sliding Doors Offer Functional Solution
Sliding Barn style doors offer a functional solution similar to pocket doors but without the hassle that pocket doors typically come with. Sliding barn style doors are excellent for large openings where a swing style door might prevent furniture placement. Because the door is hung from a track the door can be slid along the face of a wall into place, and stored on the wall when not in use. A sliding door can be used for almost any door opening as long as there is sufficient room on either side of the opening for the door panel when not covering the door opening.
![]()
Choosing Wood for a Barn Door
Choosing wood for your barn door isn’t difficult as long as you don’t stress out about picking the perfect material. Barn doors are typically built from locally available materials. In most cases, they are built from rough sawn lumber that’s similar to the barn boards used to build the barn. So what I suggest is sticking to locally available species of wood. For my barn door I chose locally available rough sawn White Pine. Before buying the wood, you’ll need to make a rough sketch of your door so that you can get all the material you need.

If you’re trying to build a “rustic” looking door and rough sawn lumber isn’t available don’t worry. Smooth, planed wood can be made to look rough with limited skills. If you do a quick internet search you’ll find all kinds of methods for making the wood look older. These methods include hitting the wood with tools, using wire brushes, and old saw blades. The best part is there is no “right” way to do it, so you can just experiment and try different things until the door has some character.
Choosing a Barn Door Design
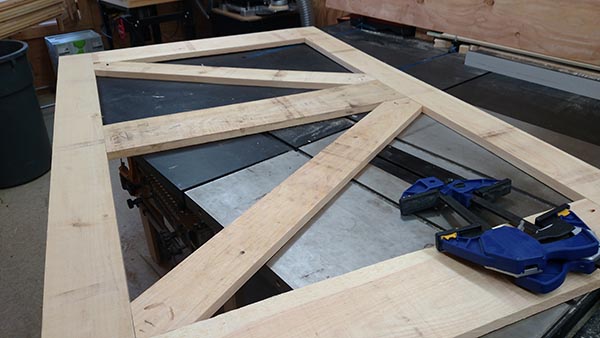
There are more barn door designs than you can imagine. So how do you choose a barn door design? Well I suggest doing a Google image search or searching on Pinterest until you find a design that works for your space. Keep in mind that some designs might not look great with the door opening size that you have. The proportion of height to width can make some designs look strange. I went with a very traditional looking barn door design that is very popular here in New England.
The design that I built is done using two layers of wood. The front “face” frame was built using 1″ thick (5/4) rough sawn White Pine that I purchased from our local lumber yard. The back layer of wood is rough sawn White Pine that’s 3/4″ thick that I had the lumber yard turn into tongue and groove. I wanted tongue and groove because Pine tends to shrink a lot and I didn’t’ want to see through any cracks that open up over time as the Pine shrinks. Another option would be ship lap style joints that would also provide the same benefit for shrinking.
Step 1 – Building the Face Frame for Barn Door
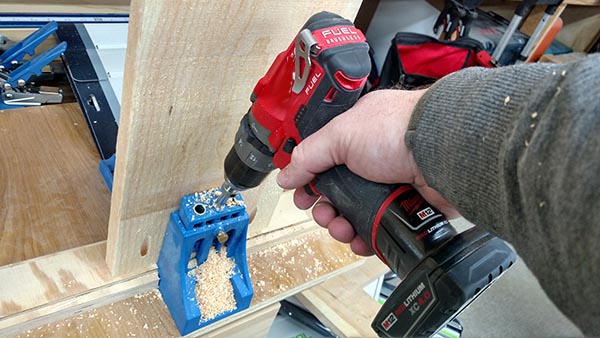
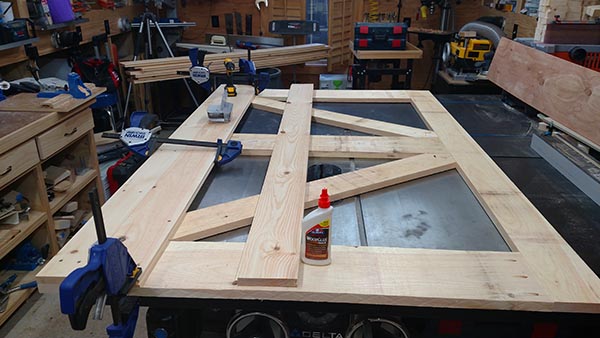
Using my sketch of the door I started by building the face frame of the door using the thicker 1″ material. The frame is built with two full height side pieces, three cross rails, and two diagonals. I like using pocket screws to build frames like this so I used my Kreg Jig to install pockets screws to attach the cross rails and diagonals to the side pieces.

One of the big benefits to using pocket screws like this is the ability to have the frame fully assembled before installing the boards to the back of it. I didn’t want any screws or nails showing from the front side. Pocket screws also do a great job keeping the joints tight and prevents separation. In the next step, the tongue and groove boards will cover the pocket screw holes so there’s no need to fill them.
Step 2 – Installing the Tongue & Groove Board to Back of Barn Door
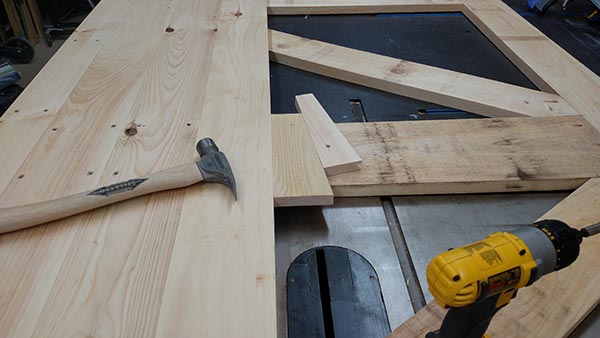
The next step to building the barn door was installing the rough sawn tongue and groove boards to the back of the face frame. For this I used screws and Elmer’s Carpenter’s® Wood Glue Max® to attach the boards. I like using a good quality wood glue when attaching wood to other pieces of wood. I’ve found glued and screwed connections to be much stronger and less likely to move over time due to drying and shrinkage. The back of this door won’t be seen very often so I was having exposed screw heads. The key is installing them in a nice straight line so they look good.
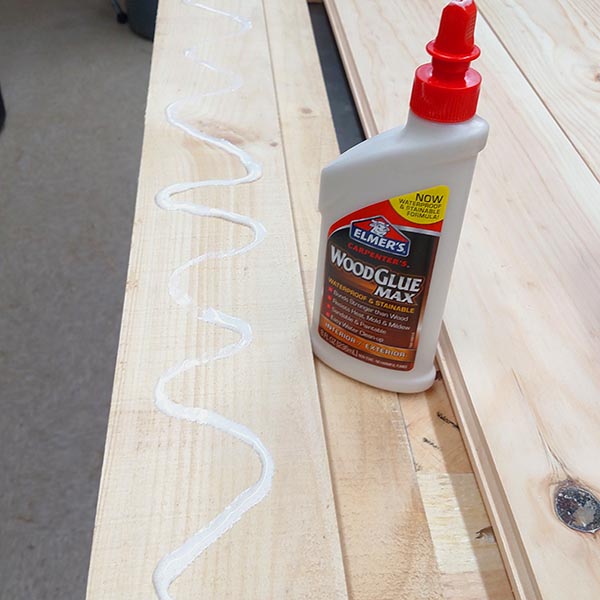
I installed the first piece of tongue and groove flush to the outside edge of the vertical rail of the face frame, I clamped it in place, applied wood glue and finally screwed it from the back side. Next I continued to install each piece of tongue and groove wood to the previous using the wood glue and screws.
Make sure you clean up any wood glue that squeezes out of the joints before it dries, otherwise it will effect your finishing process and look bad. I like using this type of wood glue because it can be easily cleaned up with a damp rag.
You can use clamps and wedges to ensure that each piece of the tongue and groove is tight to the previous one. Most wood like this isn’t very straight so you’ll definitely have to pay attention to keep the joints nice and tight. As you can see below, I used a simple wedge to tighten the joint. By cutting a slight angle to a piece of scrap tongue and groove, and screwing one piece to the frame, I gently tapped the remaining piece between the bl0ck and boards to wedge them together.
Step 3 – Finishing
Finishing the barn door provides a tremendous amount of options. Options includes painting the door, staining the door, and a wide range of faux finishes. Another quick search online and you can find some really amazing faux finishes that offer a really cool “weathered” and “old fashioned” look.

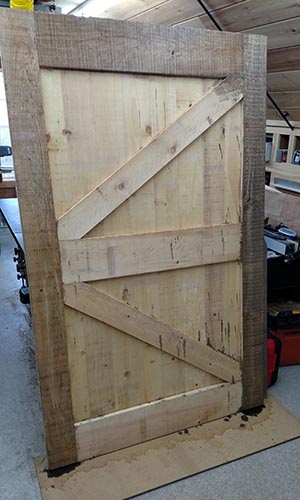 For this project I decided to try one of the faux finishing techniques that I recently read about. I wanted the rough sawn Pine to look older and weathered as if the boards were removed from an old barn. The finish I chose to use involves two steps; applying a coat of black tea followed by a solution made from white vinegar and steel wool.
The picture at the right shows the door part way through the finish process. At the time of the photo the entire door had already been coated with black tea. The areas that are grey had just been coated with the vinegar and steel wood solution. The transformation is almost immediate and it’s really incredible how well it works!
I’ll post another article with specifics on how to make the solutions for weathered wood if you’re interested in more information.
Step 4 – Final Sizing and Hanging
Once the door is fully assembled it’s important to check to be sure it’s square and the correct dimensions. I built my door about 1/2″ longer than needed, so I could trim it to the exact dimension and ensure it has a smooth flush bottom. The best way to trim down a door is using a track saw. If you don’t have a track saw a circular saw with a straight edge is also a good way.

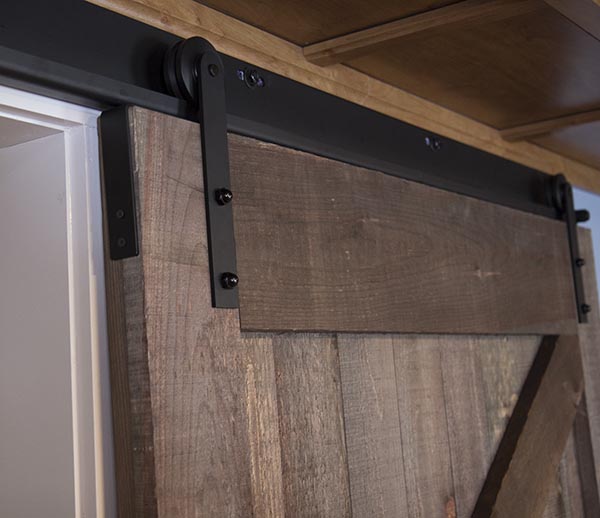
After trimming the door to length it’s time to attach the barn door hardware. For this project I purchased a low clearance barn door track from Rustica Hardware. Because this door is going in a finished basement, the ceiling height is rather low and didn’t allow for traditional barn door hardware. This J channel style is the perfect solution for low ceilings.
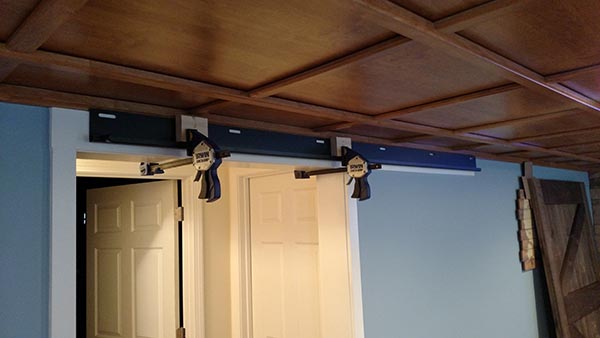
Installation of the track is pretty straight forward. I installed a trim board for the full length of the track that matched the rest of the door casing. The track is attached to the trim and header using long lag screws. It’s important that the track is attached to blocking or studs in the wall so that it has sufficient capacity to carry the loads of the door.
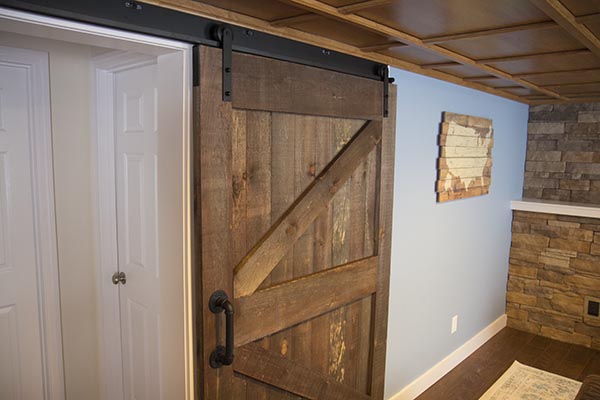
The last piece of the puzzle is adding a door handle. Again, there are lots of options to choose from. We chose a cool “pipe” type handle that seems to fit the space nicely.
This is a sponsored conversation written by me on behalf of Elmer’s. The opinions and text are all mine.


I’ve always loved these sliding doors and you’ve provided some great instructions in you post, it makes me want to convert my garage to a workshop and start making things again. I’ve bookmarked your site and plan to return often.
Hello Todd,
Great article with lots of important information. I followed your suggestion on the Rustica hardware.
Thanks very much for your skills and insights.
Very much appreciated !
Hey Todd-
Good article, but after reading similar articles and watching videos before building my (novice) DIY barn door, I learned there are a few subtle details not clearly covered.
I never understand why people say check that things are square AFTER final assembly. I have a slightly parallelogram face frame, about 1/16″ off square. There is absolutely NO flex with pocket screws and glue and diagonals! The time to catch this would have been, maybe, after assembling the rails and stiles, or better, with maybe one pocket screw in each joint of just the rails and stiles. (Root cause? I suspect my chop saw is not exactly true at 90-degrees?)
The other subtlety was how to glue and clamp my boards, which are not T and G, and were off the box store shelf, AND were not run through a planer or joiner. I opted to put glue on both joint surfaces, which created quite a mess, especially for every other board edge that was vertical! Add to that, when finished, the boards are about 1/16″ wider than the face frame, which may be my conservative tablesaw cuts of the two end boards (not mentioned in your article), or the added width of five wood and glue sandwiches?
Great advice to trim the bottom (and/or top!) after final assembly for an even edge. Excellent tip about pine shrinking, haven’t heard that before, hope I don’t find out the hard way in a couple of years if my door cracks! Love the black tea and vinegar/steel wool stain! Looks great! I like how it Affected the wood for a great Effect! (;^)
Warping…how did you account for it? Has this door warped at all since you brought it in and hung it?
It hasn’t warped at all. I did let the wood rest a bit in the shop before I built it. Also, with two layers some in opposite directions, it’s been very stable.