

Building A Paver Patio – Part 2

Building A Paver Patio – Part 2
This article is Part 2 in a series describing step by step of how to build a paver patio and fire pit. I had been thinking of building this project for quite some time so when Sakrete contacted us wondering if we had any outdoor projects coming up, I took the leap and started tearing into the lawn.
In case you missed it, Part 1 was all about excavating and building the base of the paver patio. This part is all about laying out and locking in the patio.
Disclosure – Sakrete is compensating me for writing these articles but I’m doing all the work myself and the opinions are my own. I’ve used their bag mix concrete for years but this was my first time using their Paver Set product. I had been thinking about using it for some time because I’ve been so unhappy with all of the other polymeric sands I’ve used in the past. Sakrete just provided the extra incentive to get the project started.
Layout The Circles
Now that the paver sand layer is screeded off, it is time to draw out some layout lines. With a round patio, this means a series of concentric circles. I drove a stake into the center of the fill area. The stake had to be wide enough to accept a screw in the top. I took the screed board and drove a screw through it near the end and into the stake. I then pulled a tape measure down the board and drove screws at 18″, 25″, and 8′. I then pushed the board around the sand area while the screws drew perfect circles in the sand area. The circles marked the inside and outside of the fire pit and then the outside paver edge. With these lines in place, the next few steps go really fast.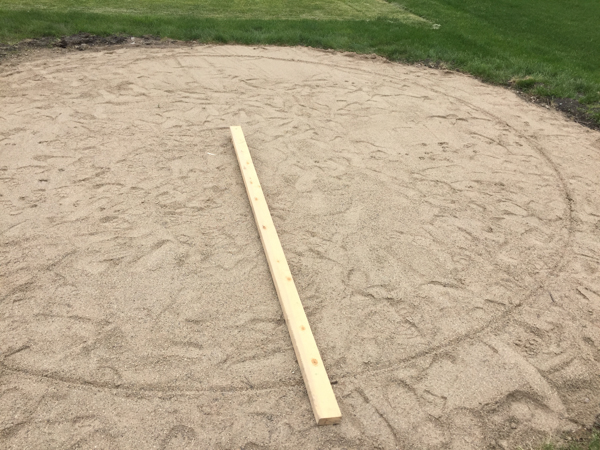
TIP: Dampen the sand a little, it helps the lines show up better.
Install the Edging
With any paver patio, one of the key components of a nice looking patio is secure edging. Edging is made of hard but flexible plastic. The edging is secured by plastic or steel spikes, often from the same manufacturer as the edging. To do a curve, the back straps of the edging have to be cut with a tin snips. Cut every strap on the edging and lay it out along the line in the sand. Drive a plastic spike every 12″ or so securing it in place.
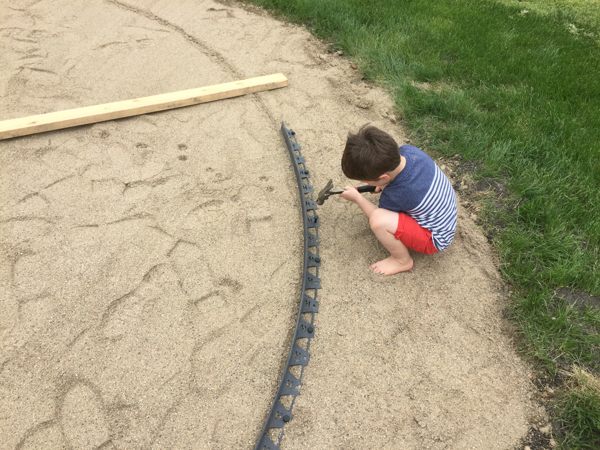
So easy, your kids can help too!
The last section of the circle wasn’t a full stick of edging so I took it to the miter saw and just buzzed if off to the right length. Being that it’s made of plastic, the carbide-toothed blade cuts right through it.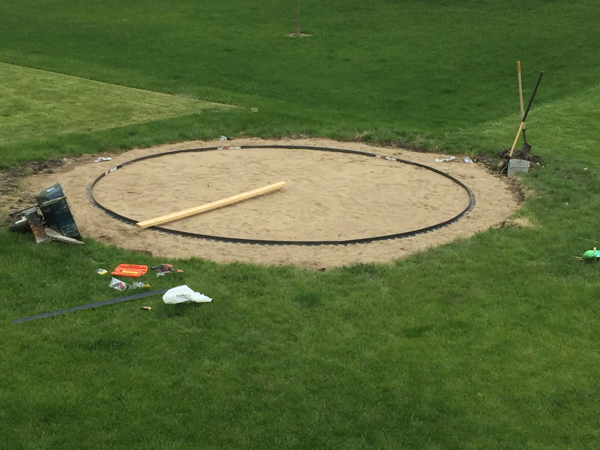
Backfill the edging with dirt so that it is sufficiently supported when the pavers are being laid.
TIP: Be sure to buy more spikes than you think you need. Every piece needs a spike on each end plus every 12 inches. So a 6 foot piece actually needs 7 stakes.
Lay Up The Fire Pit
As I mentioned in Part 1, we picked a 36″ steel fire ring liner that fit with common landscape block. I set the liner on the inner circle drawn in the sand earlier and started laying in the blocks right on the sand. The ring takes two block styles, a wedge (3.5″x7″x7″) that helps with the curve and a small block (3.5″x1.75″x7″) that helps widen the curve a little. Each course is made up of 17 wedges and 19 smalls. Over three courses that’s 51 wedges and 57 smalls in the complete ring.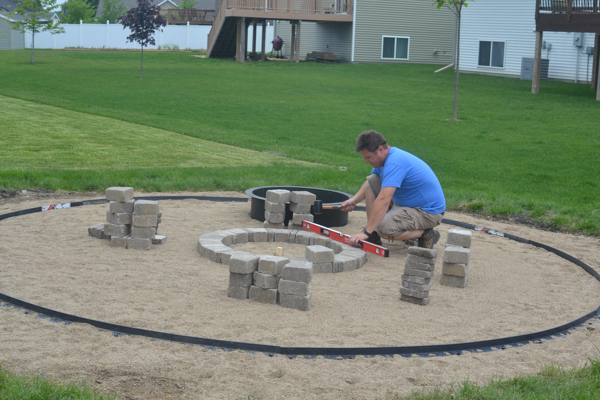
After the first course is dry laid around the steel ring, pull the ring out and set aside. The blocks may move a little pulling out the ring but that is ok. Grab a couple tubes of landscape or construction adhesive, and lay out a couple 3/8″ beads on the top of the first course. Place the next course of block on top of the first while offsetting them so that the head joints do not line up. After the second course is done, lay down two more beads of adhesive and add the third and final course. Once this course is laid, drop the fire ring back in and tap all the stones inward towards the fire ring. I just lightly kicked them with my boots to tighten up all the courses. The wet adhesive helps them move easily.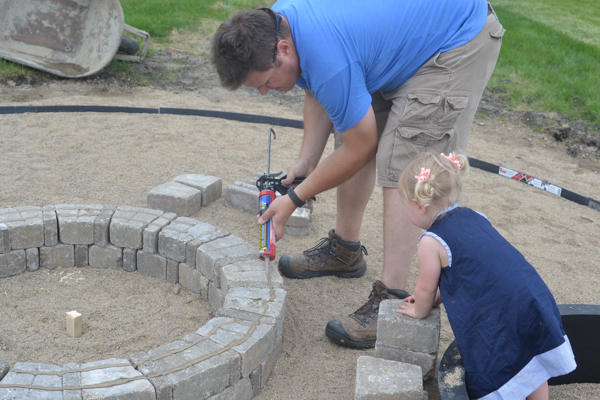
TIP: Space out the blocks around the perimeter of where they are going to be laid so that it is really easy to just grab and place them once the adhesive is down.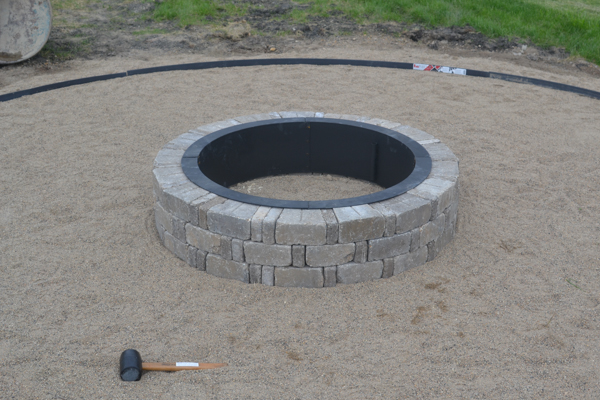
Lay Out Full Pavers
With the fire pit and plastic edging set, now it’s time to start setting the full pavers. With our design we only had two paver sizes, a 6″x9″ and a 6″x6″. We picked a pattern that looked to be somewhat random but was very simple to lay. The style of paver was called Tumbled Belgian. It is a concrete paver that has been tumbled in a large steel drum to give it a rustic, weathered look.
I started by laying the perimeter first and with the 6″ face against the plastic edging. Don’t cut any of them, lay them all out and slightly adjust the spacing so that they come out evenly. There will be slim pie-shaped pieces between them but the Paver Set will take care of those later.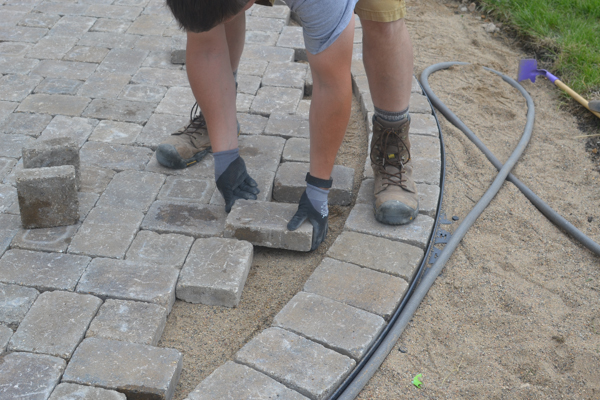
Next start the field pattern. We picked a very simple pattern. I set my first pattern somewhat centered so that the cut pieces on each side will be roughly the same. Since there was a fire pit in the middle, I had to measure. Then I kept duplicating the pattern all the way around the circle. When it was time to meet up on the other side, things were off by almost an inch. I slowly adjusted and brought everything together by lightly kicking the pavers from both sides until they met up. I laid out as many full pavers as I could until only cuts remained. This step took 2-3 hours. Pretty fast.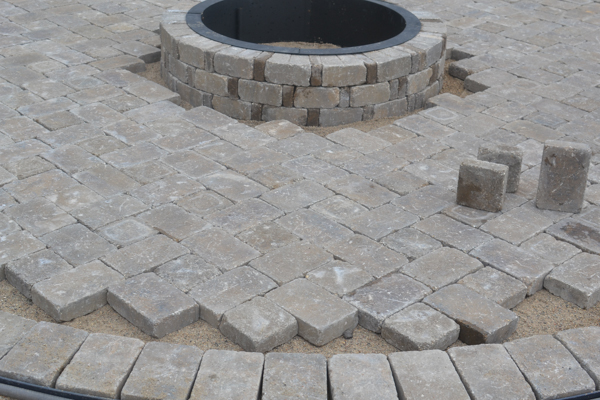
TIP: Print out your pattern so that you have an easy to follow diagram while you’re laying up.
Cut And Fit The Remaining Pieces
There is no way around it, this step took quite awhile. I had to mark and cut every piece and fit them in one at a time. I used the RIDGID 7″ tile saw with a segmented blade. It cut very well and was very safe. The cuts are a great place to use up some of the overly tumbled pavers. Sometimes you can even get two cut pieces out of a block. Since the pavers were tumbled, I lightly chipped the cut edges so that they blended in with the rest of the patio. A buddy came and helped me and this step still took us over 4 hours.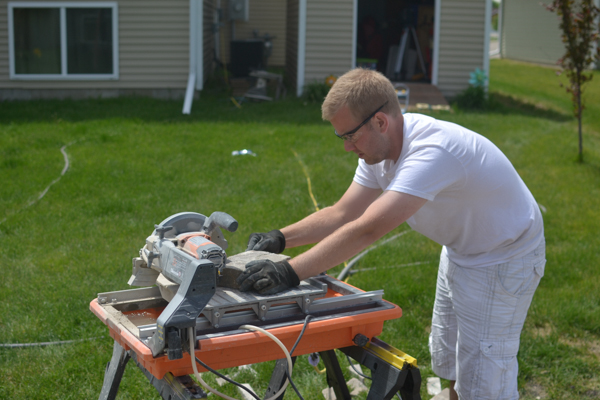
TIP: Lay the paver in place and mark the edges of where it needs to be cut, use a plastic rafter square to connect the marks to form the cut line. The plastic square handles the abrasiveness of the pavers better than an aluminum square.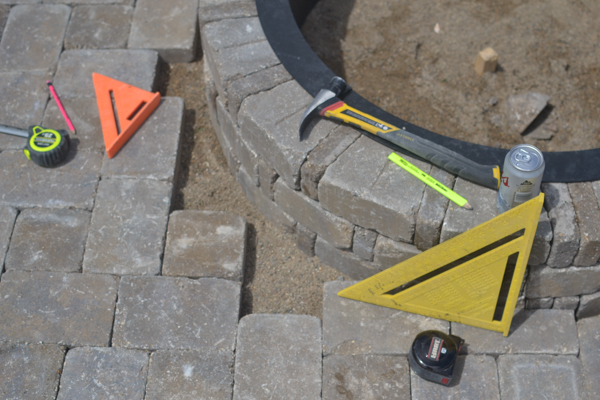
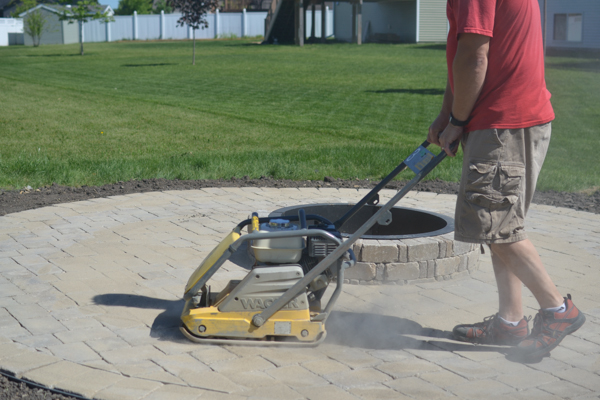
Spread And Compact Paver Set
The final steps of a paver patio is to spread and compact the Paver Set sand. The generic name is polymeric sand. It is a mason’s sand with a water activated polymer binder mixed in. I’ve used a number of other brands of polymeric sand from the big box store as well as the landscape supply but Sakrete’s Paver Set is the only one that I’ve had really good initial results. Most other brands I’ve tried do not work well for joints over 1/2″. In fact one brand’s sand cracked and broke up after a week. That one was half the price of Paver Set so it probably had way less polymer.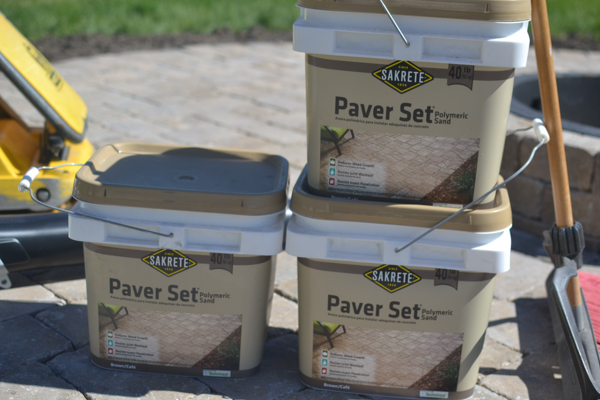
Paver Set comes in 40 lb buckets from Lowes in either tan/brown or gray in color. It has a moisture content of almost zero making it easy to spread. It is spread by sweeping it into the joints with a push broom. When the joints were completely full (or overfull), I ran a 150 lb compactor over the pavers. I just drove it around in circles like I was mowing the lawn. The vibratory action did two things. It compacted the pavers into the sand base layer below but it also vibrated the Paver Set deep into the joints between the pavers. I swept another couple buckets of Paver Set into the joints and compacted again. I did this until the joints couldn’t hold any more Paver Set. A final sweep and a few passes with the leaf blower and this step was done.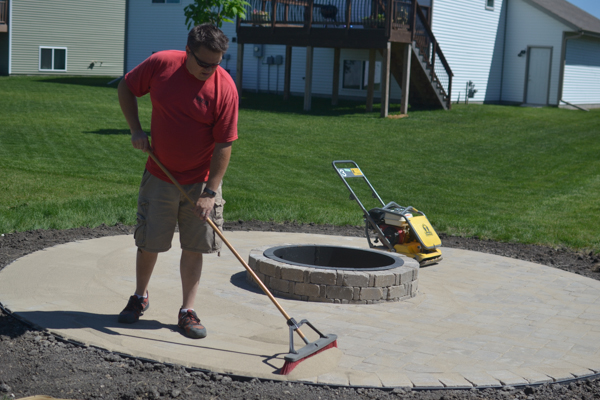
TIP: Keep the leaf blower at a very shallow angle so that it only blows the excess sand off the surface of the pavers and not out of the joints.
Sprinkle Down The Whole Patio
The Paver Set sand is activated by water so the final step was to get out the garden hose a gently sprinkle down the whole surface. The key is to do it slowly so that the water percolates down to the bottom of the joints instead of running off and taking the polymer with it. My paver patio wasn’t too large so I could water it all at one time.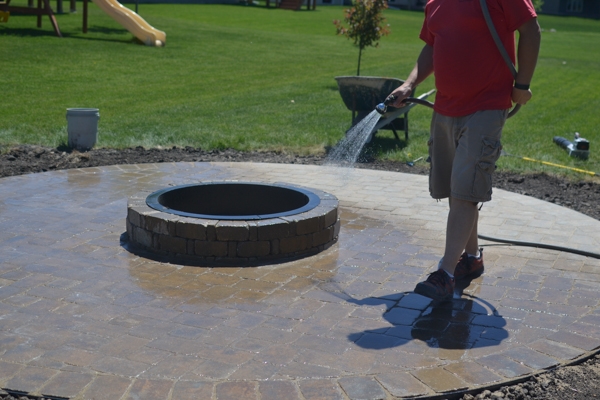
TIP: Larger patios may have to be watered in multiple sections. You want to water slow enough that the water penetrates the full depth but not so slow that it starts to set up and harden.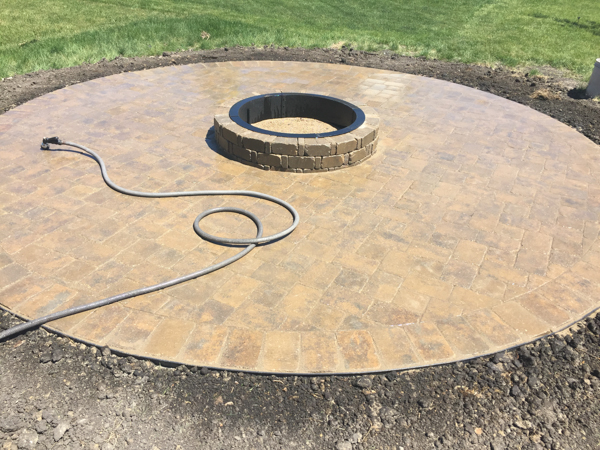
Paver Patio Done
With the paver patio sprinkled don’t rush to use it right away. Sakrete recommends staying off of it with foot traffic for 24 hours and vehicle traffic for 72 hours. We could hardly wait that long and were out there making s’mores and enjoying each other’s company by the next weekend.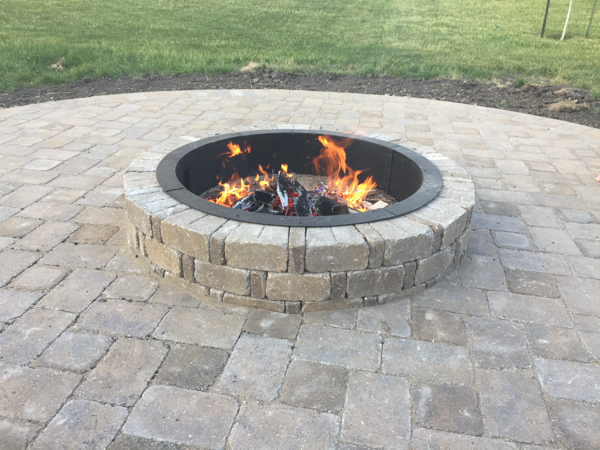
I’m not going to lie, this project can be hard, dirty work but there are products that help boost the longevity of your hard work. Like I mentioned above, Sakrete’s Paver Set polymeric sand is the best one I’ve found so far and you can bet I’ll be using it on the next patio build.
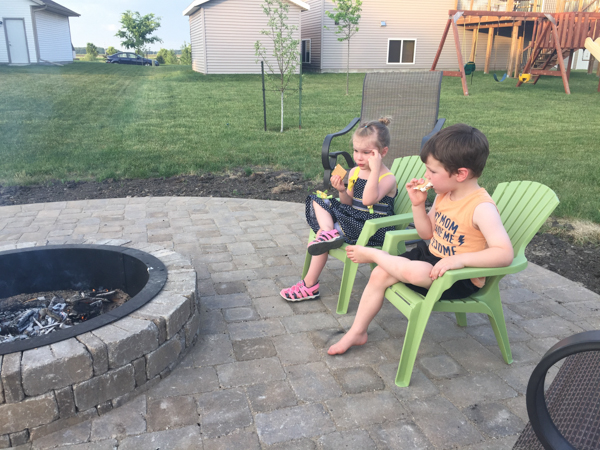
Time for S’mores!
This is a sponsored conversation written by me on behalf of Sakrete. The opinions and text are all mine.


Excellent step by step. Turned out great – I’m planning my own out and I’m curious why you wouldn’t run the pavers more into the center of the ring, and then build the fire ring on top of the pavers? To keep from having to cut all the pavers to butt up to the fire ring. I’m assuming there’s a reason, I’m just looking to save from cutting so many blocks. Thanks for any info
You guys did an excellent job with this one. I am a big fan of your work. I know I can’t build something like this but will definitely give it a try.