

Custom Colonial Style Fireplace Mantel

Custom Fireplace Mantel
There’s something about a beautiful fireplace and mantel that really makes a home feel warm and inviting. A fireplace mantel can also be a beautiful prominent architectural feature. I’ve built a couple custom mantels over the years and the one featured in this article is my latest one in our new home.
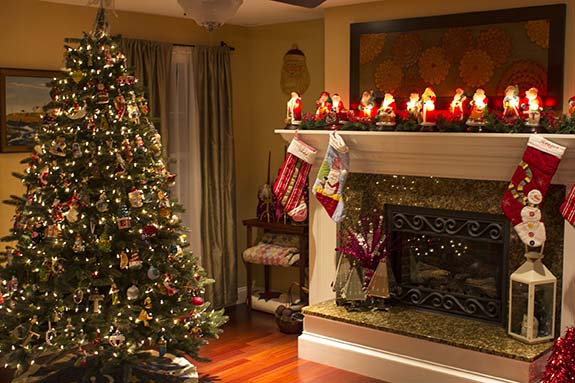
In this article I’ll share some tips on how I like to build a mantel and hopefully some ideas that you can use if you’re thinking about building one as well.
Step 1 – Mantel Design
The first step in building a mantel is creating a design. The design must reflect the design of the home while meeting fire safety/building code requirements. For some people the design will also need to reflect certain functional requirements. Below is a sketch that I created using Sketchup and several really good mantel design references which are listed below the image. I highly recommend you draw a sketch before trying to tackle this sort of project.

Books About Mantels That I’ve Read
Constructing a Fireplace Mantel: Step-by-Step from Plywood And Stock Moldings
Step-by-step to a Classic Fireplace Mantel
Building Fireplace Mantels: Distinctive Projects for Any Style Home
Making Mantels
The more planning and design work you do ahead of time the easier a project like this will be. I use my sketches to figure out how much material I’ll need to buy and also as a blueprint while I work.
 Pre-assembling Components
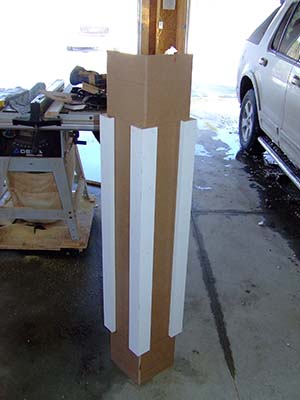
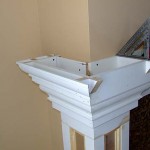
One of my biggest suggestions/tips I can give you on building a custom mantel is pre-assembling components before the installation. My building components of the mantel before you install it will drastically improve the quality of the joints and finished appearance.
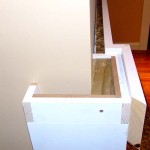
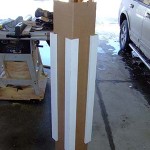
The photo to the right is a pre-assembled leg for the mantel. As you can see I built the leg using a combination of MDF and finger-jointed pine. For projects that I’m painting I like to use MDF for the base because it’s incredibly stable (lack of movement from temperature and humidity). Also, when painting something like this, theres absolutely no reason to buy expensive wood.
TIP: When building components like this with lots of miter joints, I highly recommend gluing the joints. In fact, I recommend using a urethane glue like Gorilla Glue. This will help keep the joints tight. This mantel is now over 7 years old and every single miter joint is still nice and tight.
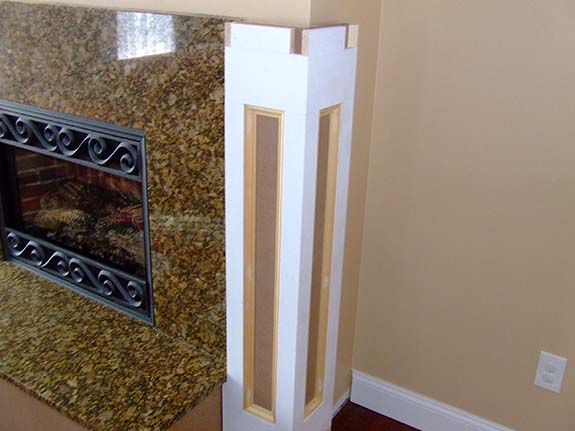
The panel is 1/2″ MDF and the rails and stiles are 3/4″ WindsorONE FJP Pine. The interior molding on the panel is 11/16″ band molding.
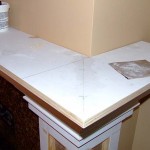
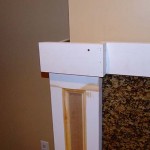
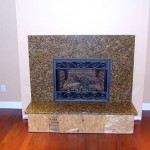
Once both legs were pre-assembled I installed them on either side of the fireplace. I could have pre-assembled the actual mantel but decided to build it in place. In most situations it’s best to go ahead and pre-assemble the legs and mantel into one unit and install it all at once. Because this mantel was being fit to the granite surround I felt it was going to be easier to build in place.

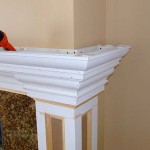
Combining Built-Up Moldings
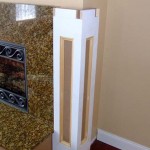
Whether you’re building a custom mantel or installing crown molding in your dining room, using built-up molding combinations can add a dramatic effect. For this project I used a combination of stacked moldings. Typically I’ll have a piece of flat stock sitting behind a piece of crown molding, so the lower inch or so of the flat stock peaks out below the crown. There are lots of variations to this approach but it creates a much more detailed look that doesn’t look like a “stock” detail.
Instead of using “stock” moldings that you find in every lumber yard I recommend you splurge a bit when doing a showpiece like a mantel. I ordered some WindsorONE crown and base moldings that gave the mantel some real character. The base is 1 1/4″ thick base molding (WOBM001). The lower molding on the mantel is WOCM003 and the upper piece of crown WOCM002. Finally the top of the mantel is a piece of 5/4 which gives it a nice balance with all the stacked moldings below.
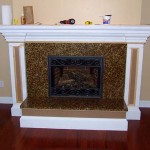
Finishing (Painting) The Mantel
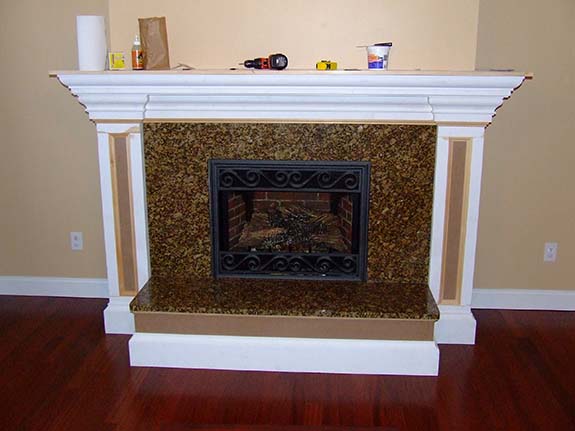
Before applying paint to the mantel I spent lots of time filling nail holes and sanding. After spending all kinds of time building a great piece like this it’s important to take the time to finish it properly. Otherwise you run the risk of ruining all your hard work. Be patient and persistent because the final product will certainly be worth all the hard work.
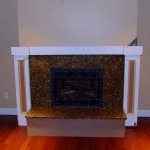
I put one coat of Binz primer on and two coats of Sherwin Williams semi-gloss white paint that matches the wood trim in the rest of the house. I can honestly say this mantel turned out even better than I had hoped for. The WindsorONE moldings were really great and the quality of them is impressive. I’m sure my family will enjoy this mantel for years to come.


Looks very nice. Great job. When my Mom and Dad were buying the house they had a choice between a fireplace or a pool. They chose pool, so we don’t have a fireplace. Though if we did I would want mine looking like that. I guess hard work pays off.
Amazing! Not only does it look great – but it actually follows your original plan exactly. (That’s really impressive to me since I end up changing my plans 100 times throughout the process until I finally give up and wing it…) AND you got it painted WAY before the 24th! I love the look – and the proportions look just right. You should be proud!
Thanks for the compliments, we’re very happy with it and it surely finishes off our formal living room quite nicely.