

How to Build a Pipe Clamp Rack

How to Build a Pipe Clamp Rack
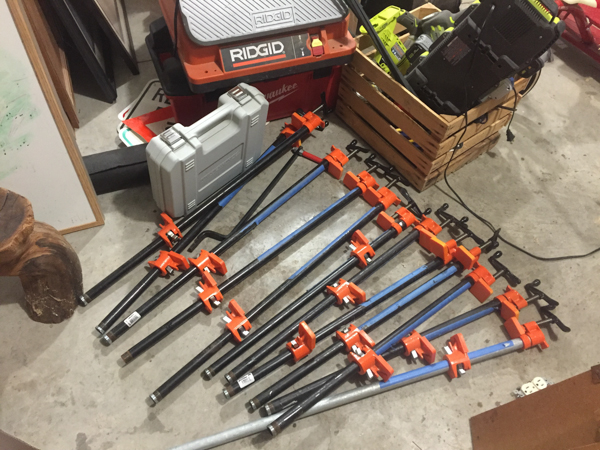
Recently my family sold our home and we move to a different town. My formerly well set up shop in a two stall garage had to be completely packed up, transported, stored temporarily, and then moved back into the new shop. It was a long, arduous process and I’m still very far from being organized and set up again. There are small piles of tools, materials, and consumables covering most of the floor. This included a small pile of pipe clamps. Here is a simple solution to build a very compact and inexpensive Pipe Clamp Rack that you can use in your own shop.
Find a Small Patch of Wall
My new shop is a 3 stall heated garage. I’ve never had a heated shop in my whole life so I’m pretty much beside myself. Additionally, the main electric panel is also in the space so I can easily add outlets and lights. The garage isn’t just a rectangular space, the third stall is set back a few feet creating a little dog-leg in the wall behind my bandsaw. Many times tools like a band saw can’t get that close to the wall because the mass needs to be centered over the stand. I had almost 10 inches from the back of the bandsaw to the wall so this area was perfect for storing clamps.
Materials and Supplies
Needed for this project is any 2x stock you have laying around that covers the wall section. Mine was around 33 inches but after just moving my scrap bin was virtually at zero. A 2×4 precut stud can be had for a couple bucks though. Additionally, I picked up 2 6′ dowels at 5/8″ diameter. The original inspiration for this pipe clamp rack came from WOOD Magazine but I knew I could make it cheaper and more compact. You’ll need a drill bit that matches the diameter of the dowel size. Also you’ll need screws to mount the completed rack. If you’re garage is stick built (out of wood), then you’ll need at least 3″ screws to secure the rack.
Mark and Drill the Holes
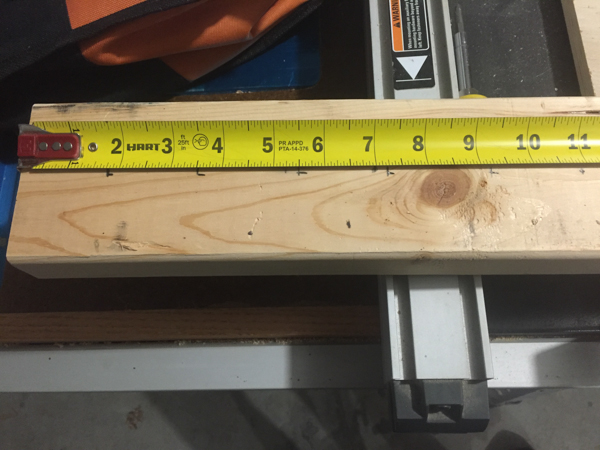
When using 5/8″ dowels the way to get the most compact yet useable pipe clamp rack is to space the dowels out 1-3/4″. With this in mind, space the first mark 1-3/4″ from the end of the board, the next mark (the matching dowel) at 3-1/2″ from the end (an additional 1-3/4″). The next mark is then an additional 2″ further to start the next set. The additional 1/4″ helps your eye to discern the slot where the clamps should go when the rack is completed. So if you look at the image below the measurements are 1-3/4″, 3-1/2″, 5-1/2″, 7-1/4″, 9-1/4″, 11″, etc. After the first measurement the spread alternates from 1-3/4″ to 2″ until the end of the board.
For drilling out the holes, you’ll need a 5/8″ forstner bit. A forstner will give a flat bottom hole and very crisp cut sides making the dowels very secure and they probably wouldn’t even need glue. When it comes to drilling the holes, drilling them tipped towards the upper edge of the board, roughly 5 degrees, helps keeps the clamps from sliding off the finished product. Drill press tables do tilt but it’s along the wrong axis. To get the right angle I just taped down a 1/4″ piece of scrap to tilt the 2×4 slightly. Set the depth stop on the drill press so that you drill the same depth every time, around 1″. If you don’t have a drill press, you can still do this project but I recommend using a spade bit like the Bosch Daredevil. It will be difficult to get consistent depth across all the holes but it is possible.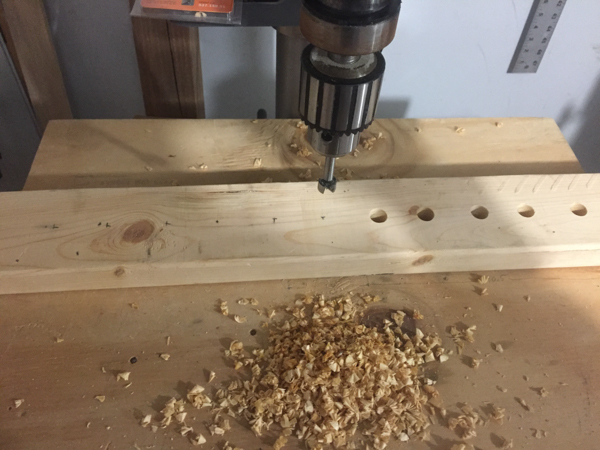


I was looking for a simple pipe clamp rack and this is just the ticket, thank you.