

Installing an Air Switch

Installing an Air Switch
Sometimes when building or remodeling a kitchen, a switch for turning on a garbage disposal may not fit in a convenient spot. This can be especially true if there is a sink in the island. Also, if you’re worried about flipping an electric switch with wet hands, an air switch is a good alternative. Today we’ll show you just how easy it is to install an air switch.
Right now I’m building a new house for my parents and they wanted a kitchen island with lots of storage. Just about every face of the island is a cabinet door. They also wanted a prep sink and disposal in the island so when they are prepping for meals they can grind up any remaining scraps. The issue is that there was no good place to mount a switch for the disposal that was 1.) attractive and 2.) out of reach of little hands (kids). Talking with my electrician he told me to pick up an air switch.
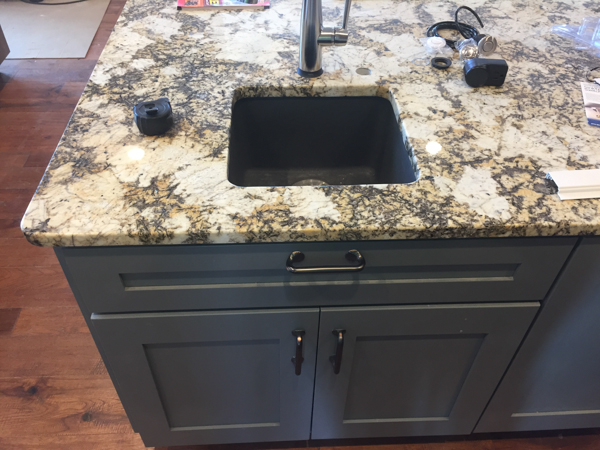
Not a good place to mount a normal switch
An air switch is a button that is mounted through the counter top that sends a puff of air down a tube when pressed. This puff of air triggers an AC power relay at the other end of the hose allowing 110V power to pass through the relay and essentially turning on what ever is plugged into it. This is usually a garbage disposal but could be used to turn on toe-kick lights or something else under the sink/countertop.
How to Install an Air Switch
Drill a hole in the counter
Determine the location that is most convenient for the switch. I like to put them up near the faucet so that they don’t get too far out from the sink. If you are mounting it in the countertop then you need to drill a hole through it. If you have a drop in sink then you may be able to use one of the predrilled holes provided. If you’re in the middle of the build/remodel, have your countertop guy do it. They do this just about every day and it won’t take them long. If you are retrofitting your current top then you’ll need a 1-3/8″ hole saw that’s suitable for the material you’re drilling.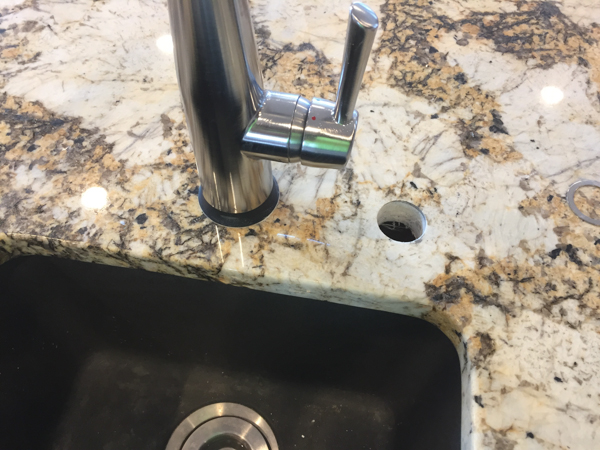
Attach Hose and Slip Air Switch into Counter
Attach the hose to the switch. There is nothing special about this connection. The hose just pushes onto the plastic nipple at the bottom of the button. Feed the hose through the hole in the counter and then the switch. Make sure the rubber gasket is still on the switch.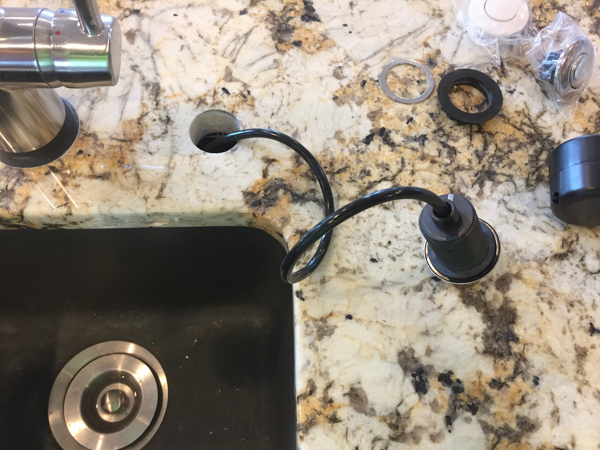
Twist the Nut onto the Air Switch
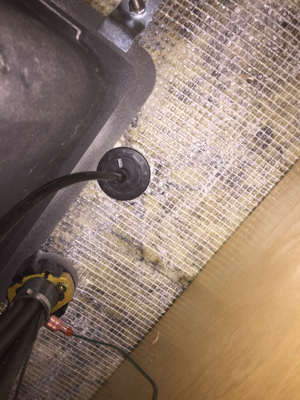 Now it’s time to get uncomfortable. Empty everything you can out of the cabinet and climb on in. Untangle the hose from any of the plumbing it may have intertwined with when you fed it down. Slip the nut over the hose, reach up, start turning it onto the switch. You may need a hand from a friend to keep a little downward pressure on the switch so you can get the nut started. No need to put a wrench on it, hand tight is perfect.
Attach the Hose to the Relay and Plug Everything In
The relay has a barbed nipple just like the air switch. If the hose is pretty long, cut some off with a utility knife. Don’t make the hose tight but not loose enough that it can make a loop under the sink. Push the hose onto the nipple and plug in the relay. Then plug in your garbage disposal and give the switch a test by pushing it. It doesn’t take much effort or a long throw of the button and the disposal should fire right up. If it doesn’t, remove the relay from the outlet and plug the disposal directly into the plug. If it runs then make sure the hose is firmly seated onto both the button and the relay and try pushing the button harder.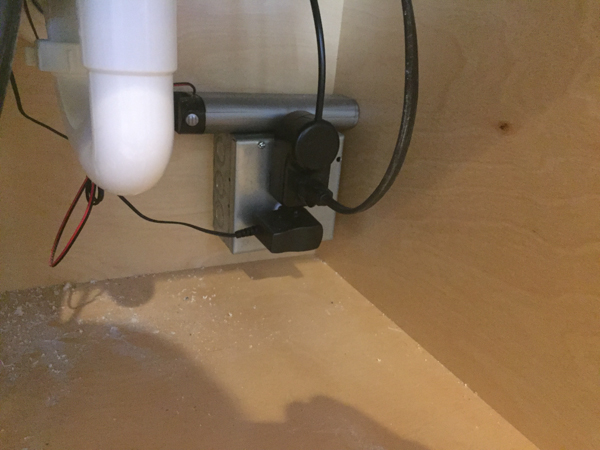
Stand Back and Enjoy the View
Congrats, you’re done. Check that off the honey-do list. Easy-peasy, lemony squeezy.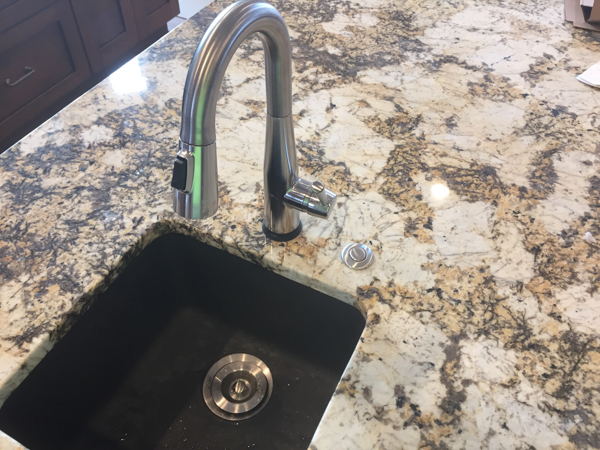
Where to Buy
An Air Switch can be purchased at The Home Depot next to the disposals or on Amazon for just under $60. The one we used in this article is made by InSinkErator and comes with everything you see in the image below including 3 colors of buttons. Brushed, chrome, and white.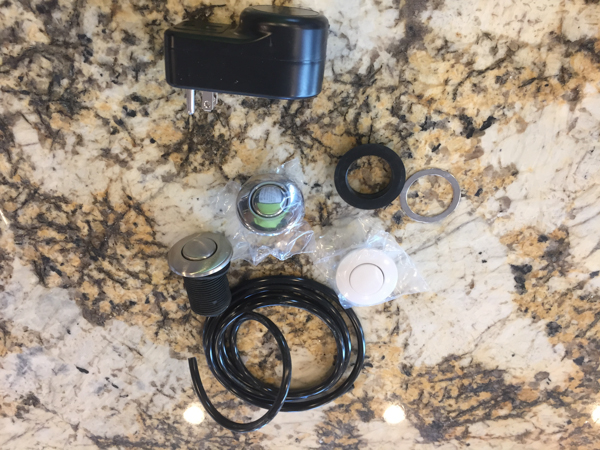


Leave a comment