Intex Easy Set 18 Foot by 48 Inch Round Pool Set Review
The weather here in the Northeast has been very warm this summer which prompted us to give in to the backyard inflatable pool fad that seems to be spreading like wild fires. Our children are beginning to learn how to swim and it seems as though every neighbor has one of these big blue swimming holes so we figured it was time to join them.
Intex Easy Set Pool
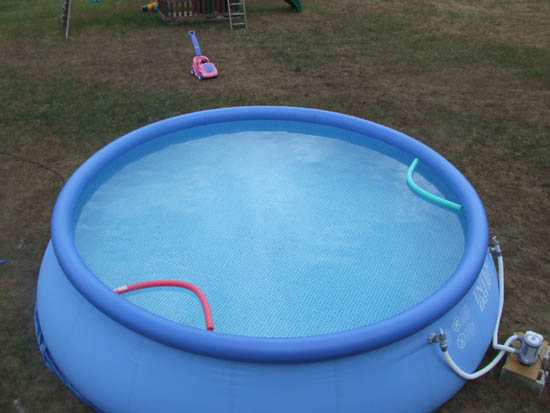
This Intex Easy-Set Pool is easy to assemble and includes a 1,500gph (5,678 L/hr.) filter pump, ladder, ground cloth, debris cover, deluxe maintenance kit and surface skimmer. Setup is easy—simply spread out the pool liner on level ground, inflate the top ring and fill with water. Pool setup and maintenance DVD is included. Ready for water in 30 minutes—no digging, sand or tools are needed. Built-in GFCI (ground fault circuit interrupter) instantly shuts off the pump if an electrical current comes into contact with water. Drain plug with garden hose adapter allows water to be directed away from the pool during draining. Pool holds 5,455 gallons of water at 80% capacity. Approximate setup size is 18’x48″.
Intex Easy Set Pool Set-Up
Setting up an inflatable pool might sound pretty daunting but the reality is that these pools are VERY easy to set-up. This particular pool comes with a great DVD that shows you exactly how to set-up the pool. I highly recommend you watch the video and take some time reading the directions before setting it up.
Level Ground Surface
The most important thing to consider with an inflatable pool is finding a level area in the yard. These pools MUST be set on level ground. Take the time to find a level area or create a level area before attempting to set-up one of these pools. There are several ways to check for level including the following:
- Before checking for level I recommend you mark out a circular area. For this pool I marked out an area approximately 20 feet in diameter by putting a stake in the ground and walking around in a circle with a 10 foot long piece of rope while spraying white paint on the ground (you can see the marks in the photo above). By marking the ground you’ll really be able to focus on a defined area.
- To check for level I used an automatic laser that has a receiver with an audible sounding indicating a position is level with the laser transmitter. Most home owners probably don’t own a tool like this so skip to the next bullet for an alternative method. Using the laser and receiver I walked around the circle and checked the elevation compared to the center of the circle. Our yard was all the same elevation within the circle plus or minus one inch (that’s level in my book!). For a pool of this type I think you want to be no more than an inch or two tops!
- If you don’t own a laser then you can do the old fashioned method. Install some stakes around the perimeter of the circle at 12, 2, 4, 6, 8, and 10 O’clock positions along with the center of the circle. Next run a string between opposite stakes so that it just “kisses” the center stake at a common height. Attach a string level and mark the stakes along the perimeter of the circle. Now just measure the distance from the mark to the ground at each stake. If the difference is more than an inch or so you’ll need to find a new location or fill the low areas with some sand or gravel.
Ground Cover Tarp
Once you’ve determined a level area the set-up is really easy. First you need to spread out the ground cover/tarp that’s supplied with the pool. If you’ve marked the area beforehand as suggested above simply place the tarp over your marks.
Layout Pool
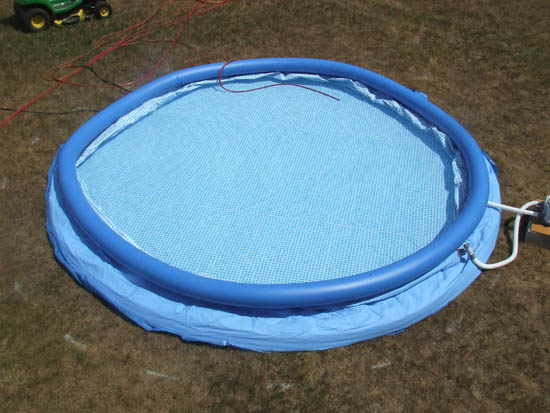
The next step involves laying out the pool on top of the tarp with the inflatable ring on top. Be sure to set the pool with the two pool pump hose holes facing towards the area where you’ll be plugging in the pump. The directions are very specific to mention that you should never drag the pool across the ground, be sure to have another person help position it.
Fill Pool With Water
Once the pool is in place you can start filling it with water. We filled ours with an inch of water and stopped. At this point it’s really important that you get the pool liner smooth on the bottom with as few wrinkles as possible. If you put more than an inch of water in it you’ll have an almost impossible task with the wrinkles.
Connect Pool Filter
This is also a good time to connect the two pool pump hoses. The pool pump hoses connect quickly and easily to the pool with simple plastic threaded connections. No tools are necessary or even suggested.
Finally Be Patient While Your Pool Fills
Filling our pool took about 21 hours using our garden hose. Filling a pool is never quick so if you’re planning on setting this pool up and having friends over the same day you better think again. This pool contains almost 6,000 gallons of water!!
Intex Easy Set Pool Review
We really like our new Intex Easy Set Pool. The pool took about an hour to set-up and we were swimming in it less than 24 hours after we started the process. At just under $400 at Amazon we feel it’s a great value. There’s no doubt our children will really enjoy it this summer and I have a feeling it will be enjoyed by the adults as well. Couple of thoughts you should consider though.
- While the pool is advertised as 18 foot diameter and 48 inches tall that’s a bit mis-leading. The 18 foot diameter is at the base of the pool. The inside diameter of the inflatable ring is probably more like 14 to 15 feet. The 48 inch height is just that, the height to the top of the inflatable ring. The actual water depth is more like 40 inches.
- The ladder works but frankly it feels a bit wobbly and weak even though it says it’s rated for 300 lbs. I’m a pretty big guy and it feels shaky to me.







These are a pretty nice way to keep the kids cool without the commitment of a permanent pool. We had one for a few years, but it seemed to stretch a little into an oblong after a while, and then there was no going back. We “upgraded” to the type that is basically the same material as this pool, but with a framework of metal poles instead of the inflatable ring. Cost wasn’t a whole lot different, and it sets up quicker and easier than you might think. The vertical walls give you more swim area and true depth (similar rinky-dink ladder, but a slightly bigger filter). We did get every dollar’s worth of enjoyment out of the inflatable top pool while we had it, so either way they are nice, relatively cheap, and when you decide you don’t want a pool anymore, you just stop setting it up. This is a good time to look for end of season clearance sales on these – that’s how we got both ours at good prices.