The key to successfully building a basket weave cutting board is making sure that you have very precise cuts so the “puzzle” fits together with perfect joints. In order to accomplish that you really need to take your time and use the proper tools in the proper sequence.
The first step in building the basket weave cutting board is cutting material down to a rough size. This can be down with a table saw and/or bandsaw. The material I used for the board was cut down from 8/4 material so I used my bandsaw to split the boards in half and make them thinner.
When you rough size the material be sure to leave extra for planing and finishing. I like to leave at least 1/8″ to 3/16″ of inch extra so I have plenty of wiggle room.
This is probably very basic for some of you, however, for beginners this step is worth mentioning. Before you cut down the rough sized lumber you need to get a true edge and face. This is accomplished using a jointer.
The jointer will give us a straight edge square to a flat face. This allows us to rip the strips so they have parallel edges. Often times it will take several passes in order to get good edges (this is why you need to leave extra material when rough sizing). You’ll need to process all three materials in this manner. TIP: BE SURE you prepare plenty of extra material. The material should be longer and wider than you’ll need. Trust me things can/do go wrong and having an extra piece can be a real big help.
Before you rip the strips of wood you’ll need to plane the material. This does a couple of things. First and foremost it makes the new planed surface parallel to the previously jointed face (be sure you have the jointed face down in planer) and it also smooths the surface that was likely rough from the re-sawing during the rough cutting.
Tip: The only way to ensure all the pieces are the same thickness is to plane them all at the same time. I gather all the material into a pile and start with the thickest piece first, I run them all through the planer, then dial it down and take a bit more off, again sending each piece through the planer. When every piece goes through at the same setting they all end up the same thickness.
The best way to approach this type of cutting board is by ripping strips of wood that are longer than each of the “weaves” on the board. You need to plan ahead and create each of these “weaves” or “bands” that you’ll eventually cross-cut to length.
The dark bands are pretty easy to do, you’ll cut these to exactly 1-1/2″ wide. Again, be sure they are longer than you need. It’s also important to pay attention to the grain direction for this design. If you look closely at the pictures, the Purpleheart that I used for my dark blocks runs along the “long” length of the board. So those strips should be about 18″ long in my case (the final board is 16-1/2″ long).
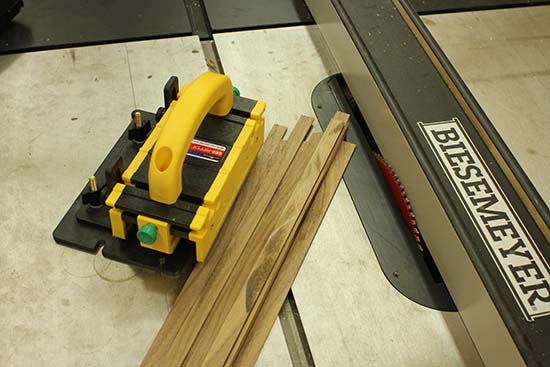
TIP: If you want your joints to come out really good it’s absolutely necessary that you tune up your table saw before you begin. It’s crucial that the blade be perpendicular to the table, the fence is parallel to the blade, and your miter gauge or cross-cut sled are perfectly perpendicular to the blade.
Next you need rip the “light” colored material. In this case these strips need to be a bit narrower because the total width of the narrow strip plus the edging needs to be 1-1/2″. In my example, I’ve used 1-1/4″ wide Maple. It’s important to note that in this case I cut two long strips (about 18″ long) and four shorter strips (about 12″ long) which follows the pattern and grain that I’ll need for my design.
Finally I ripped thin strips (3/16″ wide) of Walnut that get pre-glued to the edges of the lighter material (Maple). I made the Walnut 3/16″ wide and not 1/8″ wide because I wanted them to be a bit “big” so that I can trim them down after they are glued to the Maple. This is the only way to ensure that the assembly of Maple and Walnut is exactly 1-1/2″ like the previously cut Purpleheart.
TIP: Cutting thin strips can be quite dangerous on the table saw. I recommend either using a tool like the GRR-Ripper or building a thin strip ripping jig (I’m going to have an article on this in the near future).
Floating Walnut Bar Shelves Floating shelves are extremely popular and it's not a surprise due…
Custom Deck Project Building a regular deck is something we do a lot of but…
New Home Construction Options: Stick Framed, Prefabricated & Modular So you're considering building a new…
Using Pre-Cut Studs To Frame Walls For those that do not frame houses on a…
Replacing Taco 0014-F1 Cartridge I like to try and fix things myself when they are…
System 1738 - Engineered PVC Flue Gas Pipe Years ago we started installing gas boilers…
View Comments
I am an experienced cutting board builder and I can honestly that is one of the coolest designs I have seen in a long time. At first it looks like it would take for ever but once I read the instructions it realized any one with adequate woodworking skills could build cutting board. I urge all of the readers interested in building a cutting, try this one and than you can tell everyone that you have your very own handmade custom cutting board, and you made it yourself.
I wish I had found your video a month ago. I am currently sanding out a basket weave bowl, cut on a scroll saw. My three glued up pieces ended up being slightly wider than planned, but I wasn't smart enough to run them thru the table saw. That resulted in having to adjust the squares. Glue up was a disaster. I started in the center and worked outward. After that mess I figured the best approach was to use a 90 degree form, like you did.
I would have liked to have seen another shot or two of your finished glue up. I wanted to see how you clamped it all together.
Thanks for your video as it answered a lot of my questions.
I like your work and it is pleasing to know someone can share there good work,I will be making this board as I have made a few others,thankyou.
Hello, I have a question regarding the sizes of the wood you need to cut before, I made a model in Sketchup but when I add the sizes and look at it, it the thin strips of the walnut wood do not feel like 1/4, The walnut wood looks a bit too thick, I would like to check before I attempt to make this if the thickness for the walnut is 1/4 or if it is less.
Thanks,
I believe mine were about 1/8 to 3/16" wide...certainly not 1/4"
any issue with grains going different directions
Not at all...still looks like new!
May I post part of this on my personal blog if I place a reference to this website?
Monsoon http://www.monsoondressestore.com
Sure
Beautiful board. I’m going to start one tomorrow. This will be my first basket weave board. I build end grain boards. Just curious. Have you run the finished board through a planner? Wondering if the different grain directions would plane ok.
I was thinking about it and decided I didn't want to risk all my hard work.
Nice, Im getting to work on this today. I have everything planned out and I'm using purple heart, walnut and oak. Thanks for the great tutorial!
Great timing Todd. I'm making Christmas gifts of all kinds. Cutting boards were definitely in the mix. I enjoyed your step by step instructions including the tips! My only wish was for some pictures together with the text. I've always been a visual kinda guy, I can build just about anything if I see it I can build it.
I'm still going to give it a shot because the end result is awesome. So thank you for your time, great job!
Jason, is there anywhere to see your finished result?