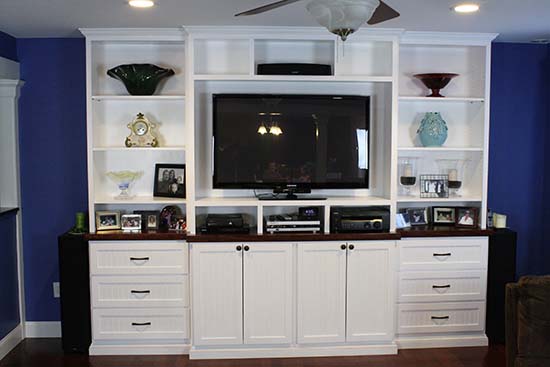
Built-in cabinetry can add beauty and functionality to any home and a custom look sure to impress friends and family.The best part is you don’t have to be a master cabinet maker or carpenter to build some beautiful built-in cabinetry. I built a custom built-in entertainment center for our flat screen TV and stereo components. While the project may seem complicated, this article will show you a few simple techniques that make it manageable for people with moderate carpentry and DIY skills.
Before tackling a project like this it’s imperative to create a design. Without a design you’ll likely run into all kinds of problems and the finished project will end up looking like you made it in grade school.
For this project I first put pencil to paper and roughed out a few different ideas along with basic dimensions. I measured all of my existing electronic equipment and printed out dimensions for possible future products in order to have some flexibility in the design. The simple sketches were a great way to get the “other boss” in the house to sign off on a concept and add her two cents.
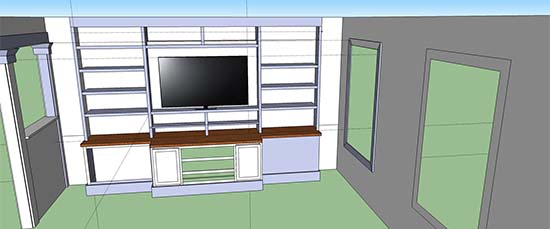
Once I zeroed in on a design I made a much more detailed plan using SketchUp (a hand drawn sketch is also fine, but I prefer building a 3D model). SketchUp is a free program that allows you to draft in three dimensions and view the project from an infinite number of angles. My 3D model allowed me to see how the cabinet looked with respect to overall scale and style.
As you can see above I didn’t completely finish my model but did develop it far enough to set my dimensions and basic layout. As I was building the cabinet I did make a couple of small changes compared to model. SketchUp is an extremely powerful tool that I highly recommend. Even if you’re not a person with CAD experience I think you’ll find the program very intuitive and easy to use.
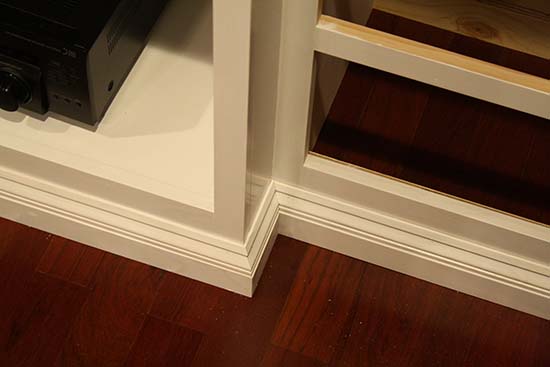
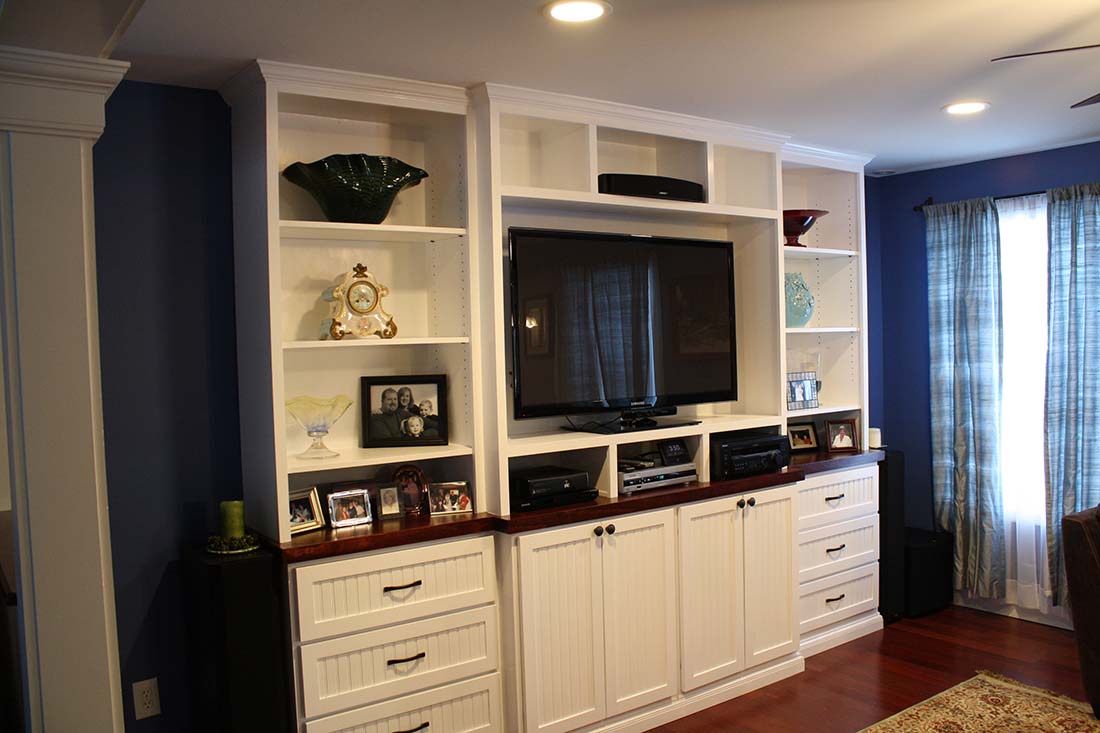
One unique feature that I added to my design was a simple chase behind the TV. If you look closely at the cabinet, the TV section bumps out 3 inches deeper than the sides. This adds some detail to help offset the size of the cabinet but it also serves a purpose. The entire cabinet sits away from the wall 3″ and serves as a wire chase. I cut a small hole in the upper cabinet back where I run wires back into the chase and down into the back of the lower cabinets. It’s a great way to hide the wires and the average observer won’t even notice that the back of the cabinet isn’t tight to the wall.
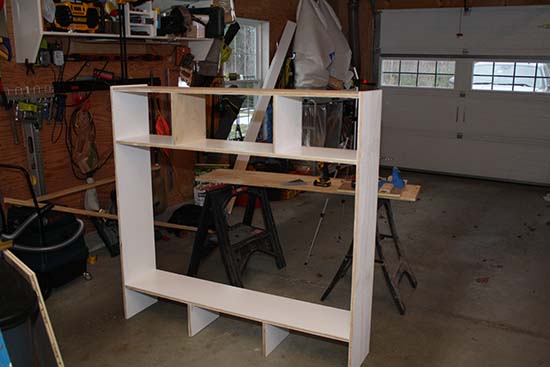
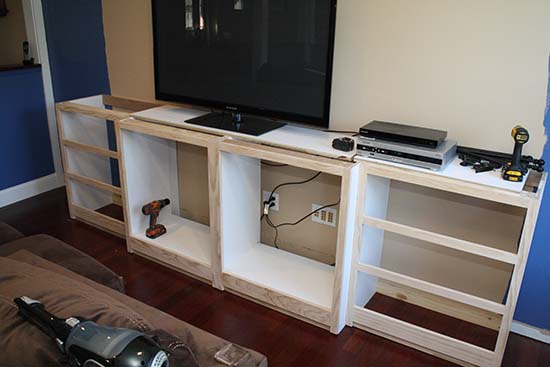
After you have a design created you’ll also need to think about how you’ll build the cabinet(s). I like to take a modular approach almost as if I were going to buy “boxed” cabinets from a retailer. With that approach you’d build each section of the cabinet as a box, lower cabinets, upper cabinets, then install them on-site and screw them all together.
For my project, I’m taking a slightly different approach. Each of the lower cabinets (4 sections) will be built in boxes. The upper section will be split into 3 sections (center and two sides). The important thing is planning ahead so I can build as much as possible in the shop and limit how much assembly has to be done on-site.
I also built all the face frames in the shop which I attached to the boxes once they were installed in the room. The face frames are easily built using 1x material that I ripped on the table saw. For added precision I chose to joint the edges of the material before breaking it down on the table saw.
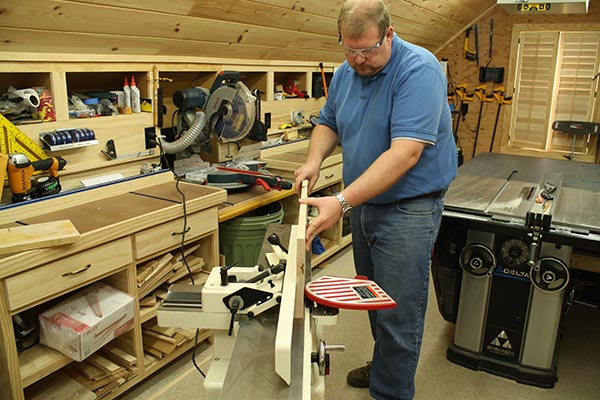
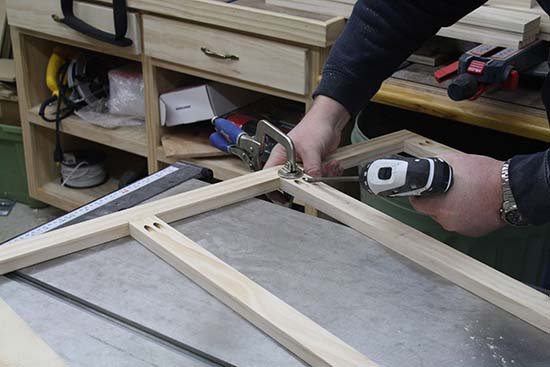
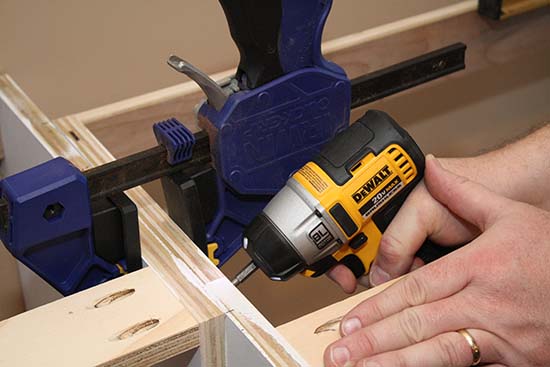
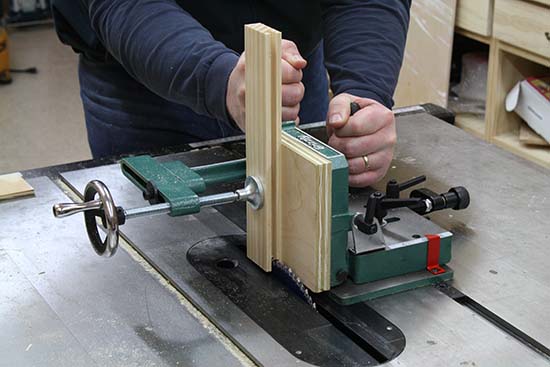
Traditional cabinet joinery can be complicated and require special power tools. Luckily there are alternative methods for building cabinets that are much simpler and only require reasonably priced tools. I’m a huge fan of using pocket screws to build cabinet boxes. Ever since being introduced to the Kreg Jig I’ve drastically increased the number of cabinets I’ve built because it’s so much easier and faster.
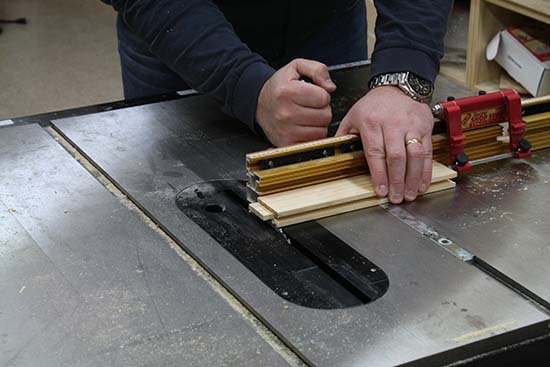
After I built all the boxes, I built the cabinet face frames using pocket screws. In the photo above you can see me assembling a face frame using pocket screws and a Kreg Jig. This is so much faster than more traditional mortise and tenon or even biscuit construction. The joints are incredibly strong and always tight.
TIP: Pocket screw joints are really great, but in order for them to look good and hold really well the cuts need to be accurate. Be sure to tune your miter saw and/or table saw for plumb and square cuts.
When building built-in cabinets I like to make a single, solid face frame for each section of the cabinetry. So for this project I had a face frame for the center section, and each of the side sections. This is a bit different than buying box cabinets that each have an independent face frame. This also typically will require you to install the face frames in the “field” compared to doing it in the shop. I like this approach because it makes the “lines” of the cabinets look much cleaner and streamlined.
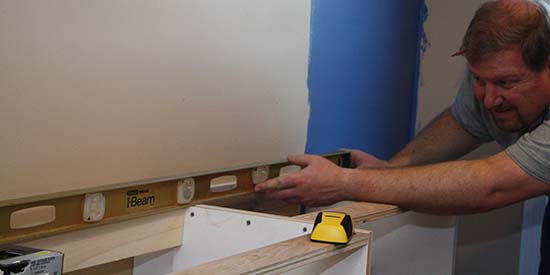
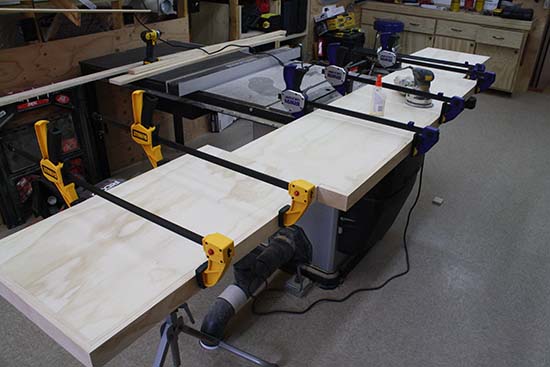
Once you’ve built all the cabinet box sections and face frames then it’s time to install them. It’s important to take time to establish a level layout line and figure out if there are any “high points” on the floor. Start by setting the cabinet that sits on the highest level first, and level all the other cabinets to that cabinet.
TIP: When installing cabinets, it’s really important to use a long level (6′ long at least if you can get one). A small difference in one cabinet can translate into a big deal by the end of a cabinet run, so it’s important to check level often and over a long distance when possible.
Once I installed the base cabinet boxes I then installed the face frames. I opted to face nail the face frames because I painted these cabinets. If this had been a “stain” job I most likely would have attached the face frames with pocket screws as well. Another option is attaching them with biscuits. It’s worth pointing out in all three cases I would use wood glue in addition to the fasteners.
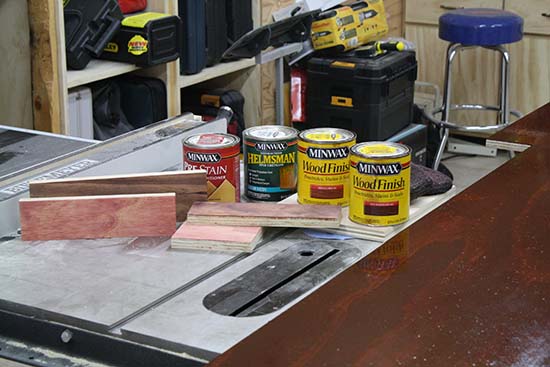
For this particular project I installed a wood counter-top on top of the base cabinets followed by the upper shelving units. This step isn’t necessary but it creates a really nice custom look. A pre-fabricated counter-top could be used or you can build a custom one similar to this one. I used cabinet grade plywood and stained it to match the Brazilian Cherry flooring in the room. The options are countless including stone, laminate, and even ordering a custom solid wood top.
One of the more challenging tasks in building your own cabinets are making the drawers and doors. It’s the task that often keeps people from trying to build their own cabinets. I’m not going to try and teach you how to build them in this article (I will try to write an article on each topic soon however), but I will show you what I did for my drawers and doors.
There are other options though that you can consider including buying pre-made drawers and doors. There are lots of online companies that sell cabinet drawers with dovetail construction that just need a drawer front and hardware. You can also buy cabinet doors in nearly any species of wood with nearly any finish you like.
A quick search on Google will turn up dozens of options. I happen to like using Rockler for all of my cabinet resources so they are a good place to start.
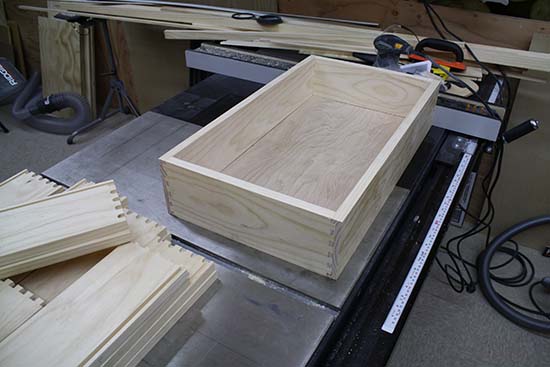
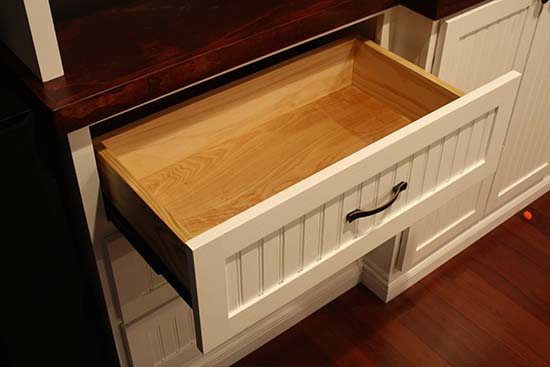
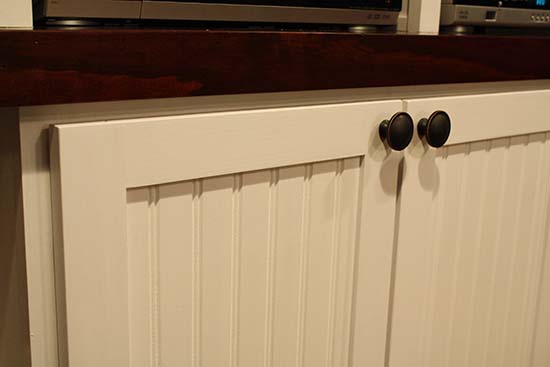
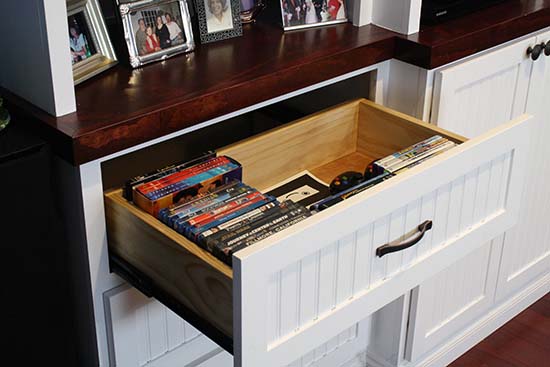
For the drawers I built pine boxes with dovetail joints and a 1/4″ plywood bottom. I then built drawer fronts to match the doors with a Shaker frame and bead-board center field.
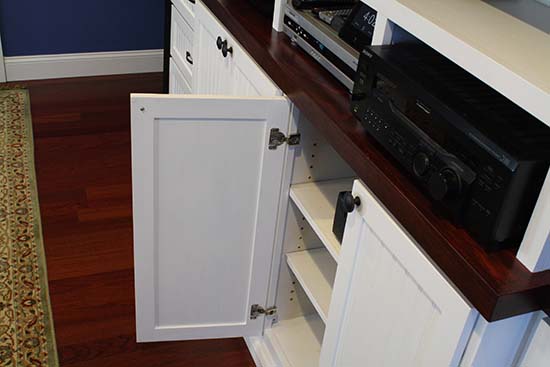
For the cabinet doors I built a Shaker Style plain frame with a bead-board center panel. I used a traditional mortise and tenon detail with a dado to allow the bead-board panel to “float”. These look complicated but once you get the hang of it they can be pretty easy to do and quite rewarding. Remember, you can always order doors and drawers if you’re feeling overwhelmed!
After I built all the doors and drawers I installed them on the cabinets after the cabinets were installed. If you build all the cabinets as individual units you can install the drawer and doors in the shop. I used full extension drawer glides from Rockler and European style door hinges from Rockler as well.
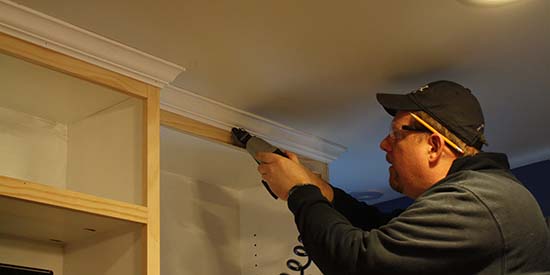
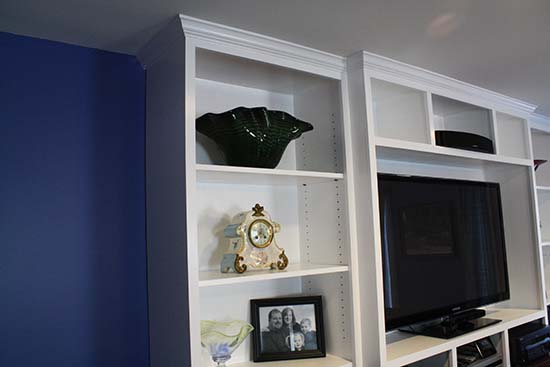
Adding decorative trim like crown molding cabinets is a great way to add extra detail and also help create a finished built-in look.I added a simple crown molding to the top of the unit (this also allows the upper cabinets to be slightly shorter than ceiling height which makes installation easier) and a simple base board to the bottom.
Clearly building a custom entertainment center is a big job and not something everyone can tackle. However, if you have the patience and some basic woodworking skills it’s a great way to save some money and create a unique piece of furniture that friends and family will marvel at. The possibilities are endless so let your creative spirit free and build your own. I hope the photos and tips from my project can inspire you to build one as well. Enjoy!
Which is Better a Stick Nailer or Coil Nailer? Framers have many choices in nailers…
Estimating How Many Nails for a New Roof When it comes to estimating materials for…
Composite / PVC Decking Layout Tips and Advice Composite and PVC decking have really changed…
Benefits of ERV Systems (Energy Recovery Ventilator) If you're building a new home or doing…
Vermiculite Attic Insulation If your home was built before 1990 there is a chance it…
Arc Fault (AFCI) Circuit Breakers Tripping Often An arc-fault circuit interrupter (AFCI) or arc-fault detection…
View Comments
Just out of curiosity how much did this project cost if you dont' mind?
About $300 in materials.
Great looking cabnets! Could you tell me how wide the stock is you cut for face frames please?
Typically I make the rails and stiles about 1-1/2" wide.
I absolutely love this built-in and it is exactly what I'm looking for. Do you know any carpenters in the Hunstville/Madison Alabama area that you would refer?
Thanks for the compliment. Unfortunately I do not know anyone down there. I'd ask friends/relatives/co-workers if they know any local carpenters/cabinet makers they can refer. Good luck.
what is your method for attaching the upper bookcases to the top of the counter top? Did you use pocket holes? Did you screw them in from underneath? I'm assuming they are screwed into the wall behind them, but what about the counter top. Thanks! Great Work!
Mike - I installed a pocket screw near the front right behind the face frame where you can't see the patch. Thanks for the compliment.
Mike,
I love everything about the entertainment center! Will you sell your plans? My space is 110 inches wide, and I can make the unit if I have plans. Just can't afford to buy a ready furniture right now.
Thanks so much for sharing your talent and skill with us.
Marie
Marie - I don't have any plans :) I sketched it out in SketchUp and built it as I went. If I had plans I'd share them :)
Todd, what types of wood do you recommend for this if you plan to paint them white?
If you're painting it white as I did....pine and poplar are great choices. Good luck.
When you painted did you prime first? What brand and type of paint did you use and how many coats? Looks great!
Thanks for the kind words. I used Benjamin Moore paint. I primed everything first, then applied two coats of semi gloss white.
Great looking piece of furniture! How tall did you make the cabinets?
The lower units are 36" tall, the ceiling height is 8'.
I saw you make the doors w/ bead board by making a dado in the pine and centering the bead board which would work for the doors, however, what about the face of the drawers? If you made a regular face like the doors wouldn't there be a gap between the face and the actual drawer you attached to causing the handle to be unstable or have flex.
Clayton - Good observation. I make the face frame the same as the doors, but I also mount that face frame to the solid drawer box, and install the pull through the face and the drawer box, leaving it very sturdy.
Awesome looking piece of furniture. What is the depth that you made the cabinets?
The upper shelving is 12" deep, the lower side cabinets are 15" deep, and the lower center cabinet is 18" deep.