1/2" Underlayment
Here are some recommended guidelines on how to properly install subfloor and underlayment.
All of my remodeling projects consist of gutting down to the studs and starting over. I prefer this method for these reasons: confirming there is no rot, water damage or insect issues, increased insulation values, and to confirm there are no electrical or structural hazards.
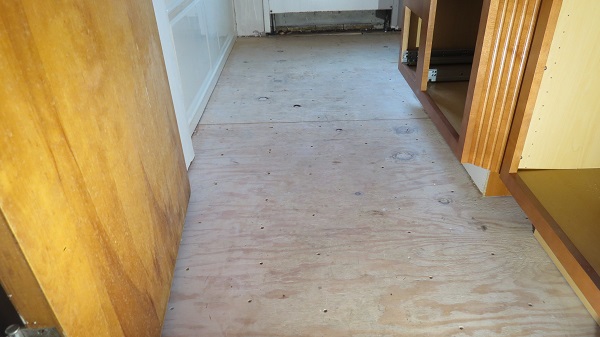
After reading the recommended guidelines from APA, The Engineered Wood Association, I have changed my plywood installation practice under tile floors. In the past I always glued and screwed the plywood down to the floor joists. Then I would install on top of the plywood one of the many waterproofing membranes available on the market. Using this concept I was not letting my wood underlayment move. Recently however, I learned that by actually letting the underlayment move it can reduce potential tile cracking.
I still recommend that the first layer of plywood sheeting be glued and screwed or nailed with ring shank nails into the floor joists. However, the next layer or underlayment should not be glued down. Instead, it should be screwed down every 6” with the fasteners only being as long as your total thickness of the subfloor & underlayment. Fastening the underlayment in this way ensures the screws are only embeded into the subfloor, not into the floor joists. Its important to use multipurpose framing screws because they are rated for interior/exterior and cement board applications among many other uses. Drywall screws are for drywall and do not have the strength of a multipurpose framing screw. As for spacing, allow 1/8” spacing between all plywood joints and ¼” spacing off of walls, cabinets and solid surfaces.
I read in the APA, The Engineered Wood Association guidelines about staggering end joints of your underlayment by 2” from the joints in the subfloor panels, offsetting end and edge joints of underlayment panels. The underlayment should be installed perpendicular to your floor joists as well. This can be varied if the finish flooring manufacturer that you are using has other recommendations. It’s good practice to stagger the sheetse as much as possible which also results in less waste and larger pieces.
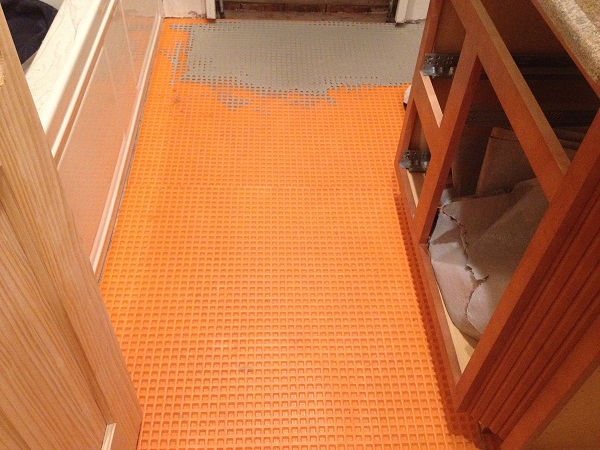
After you have installed your subfloor/underlayment and it is nice and sturdy like you’re walking on concrete, you can waterproof the floor. There are many choices of water proofing membranes. When choosing keep in mind the application and if heat cables will be installed, or if thickness is going to be an issue. Always install per manufacturing recommendations.
For me, this newer approach of allowing movement in my subfloor/underlayment installations is just one part of providing good practice to clients. I feel that it’s fair to say that in every field continuing education is recommended and will assist you in learning the best and most current practices. By using an educational approach with my clients I find that it helps them understand why we install the way we do. Using the best practice approach and pre-planning should reduce any possible call backs in the future.
Which is Better a Stick Nailer or Coil Nailer? Framers have many choices in nailers…
Estimating How Many Nails for a New Roof When it comes to estimating materials for…
Composite / PVC Decking Layout Tips and Advice Composite and PVC decking have really changed…
Benefits of ERV Systems (Energy Recovery Ventilator) If you're building a new home or doing…
Vermiculite Attic Insulation If your home was built before 1990 there is a chance it…
Arc Fault (AFCI) Circuit Breakers Tripping Often An arc-fault circuit interrupter (AFCI) or arc-fault detection…