

How to remove a stump (Part 1)
)
How to Remove a Stump without breaking your back or the bank (Part 1)
Last year I cut down a large maple tree in the yard that was only 10 feet from the house. The previous owners never should have planted it that close. Over the years as it grew, the roots started getting bound up on the house foundation. It was only a matter of time until the roots started wrecking havoc on the structure so down it went. Now the only remnant is a big stump.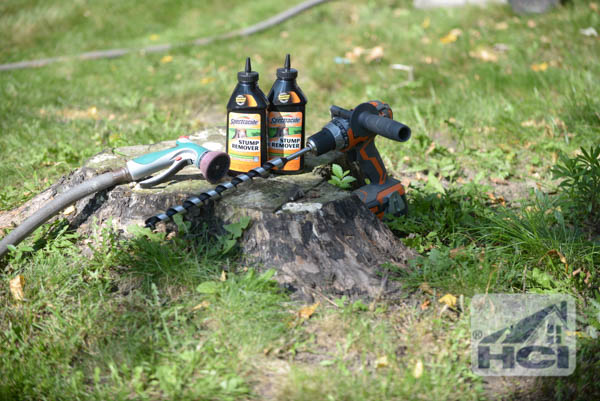
Get rid of most of the stump with the chainsaw
When I felled the tree the final back cut was at a comfortable height for me, about 2.5′ above the ground. The first thing to do after the rest of the tree is all cut and cleaned up is to pare down the stump. The chainsaw is the easiest way to do this but one can’t cut too close to the ground because dirt is the enemy of a sharp chainsaw chain. My method of choice is to clear as much dirt as possible away from the stump with a shovel and then girth the stump with a hatchet. Cutting off the bark all the way around ensures that you won’t hit any dirt or stones that may have been trapped in the bark.
Let the stump sit
This method relies on the stump not being too green. I let mine sit for about a year. It was low enough that I could clear it with my snowmobile but I was getting tired of going around it with the mower and the wife was starting to 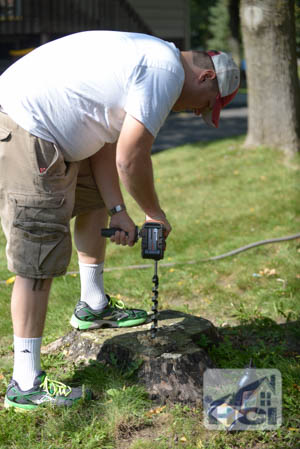 complain. Four seasons seems like a reasonable amount of time to wait.
Gather the supplies
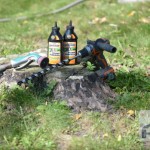
This method uses a cheap and easy to find chemical stump “remover”. This really means that the chemical accelerates the rotting process from years down to weeks. The product shown is this article is made up entirely of potassium nitrate also known as saltpeter. Other items needed are a 1″ auger bit, a drill capable of driving the bit, and water. For the 8 holes I’m putting in this 22″ stump it will take 2 – $6 bottles of the remover.
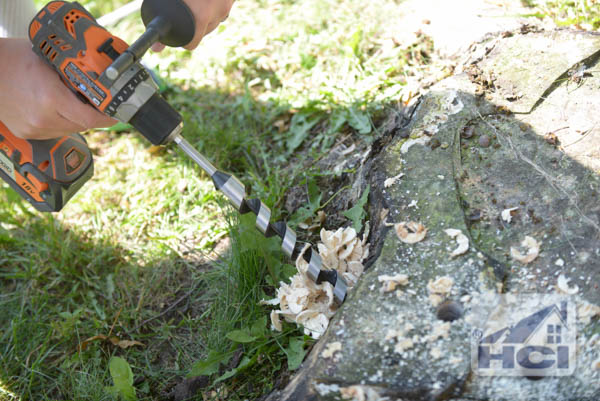
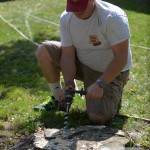
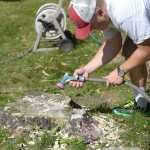
Drill holes in the stump
For the potassium nitrate to work it needs to penetrate the stump in a number of places. This is accomplished but using a 1″ auger bit and a good sized drill. A right angle drill or Milwaukee Hole Hawg would be ideal. My 18V cordless had a little overheating issues driving such a large bit.
Start by drilling a vertical hole about 3-4″ in from the edge of the stump. The directions recommended drilling a 12″ deep hole but given that I had the stump cut down so far already the 12″ wasn’t necessary. I drilled right around 8″ deep. Next drill a diagonal hole on the side of the stump starting about 3″ down from the top that will intersect with the vertical hole. This allows the rotting process to breathe.
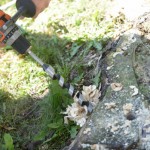
 Fill the holes with stump remover
 According to the directions on the product I’m using it says to pour a fourth of the bottle in each vertical hole. A bottle contains 16 oz so 4 oz is the recommended amount in this case in order to get the stump to rot in 6-8 weeks. Since I only drilled 8″ deep the 4 oz came up almost to the top of the hole. The product is granular like sand and the pour nozzle makes it really easy to get into the holes. The MSDS sheet didn’t specify eye or respiratory protection so that’s why you don’t see any in the images. It’s a relatively safe item to handle except around fire, don’t smoke when doing this.
Water and protect
To activate the process, the holes should be filled with water but not to the point of overfilling. You want the saltpeter to stay in the holes and not run out over the top. Over the next few days more water may have to be added as the saltpeter dissolves and gets absorbed into the stump. The last thing to do is protect the area from small children and pets. While the MSDS sheet is pretty tame it is still a good idea to protect the area. You can use chicken wire, snow fence, or even stakes and string to surround the stump.
Wait it out
Now comes the waiting game. Depending on the type of wood and the size of the stump it may take awhile. For sufficiently wide stumps, they may have to have this process repeated as the outer layers of the stump rot away. If you’re not in a hurry this method is a great way to save money and labor. Part Two will go into how to remove the remnants after the potassium nitrate has done its thing.

-
- Relatively safe project, kids can watch but don’t let them handle the potassium nitrate


Once drilled the holes, wouldn’t it be faster (and funnier) to fill them with explosives?
I hope we don’t have to wait a month for part two. I’d like to have the whole process laid out before I break out the saltpeter.
Where are the safety glasses? Wood chips flying and chemicals splashing could wreak havoc on the orbs if not protected!
Is there a “how to remove a stump part 2” coming?
Dynamite is much quicker and more satisfying to use. You just need to remember to put sheets of plywood over the windows on the side of the house facing the stump. Maybe the neighbors ought to as well. And you don’t want to be too close to the house either. Other than those simple precautions, it’s a more simple process.