Last year I attended a really cool Media Event with the folks from Rust-Oleum down in New Orleans. The event introduced several new products including the new Cabinet Transformations. If you’re not familiar with this new product you can quickly learn about it by reading over my article from the event. In a nutshell Cabinet Transformations is a product designed to make painting your kitchen cabinets easier and more professional looking.
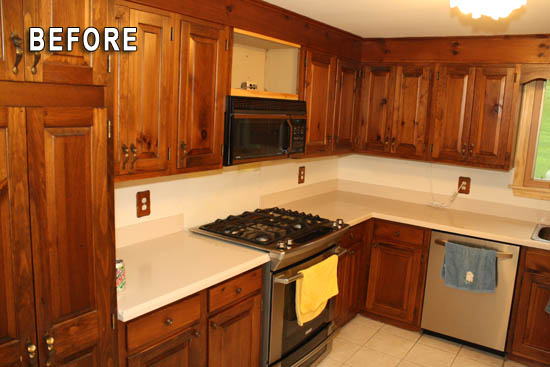
Instead of bogging readers down with all kinds of crazy specifications I thought we’d tackle a kitchen cabinet renovation project to show all of you how effective this new product is. Below is a picture of my dad’s kitchen prior to the Rust-Oleum Cabinet Transformations project. The cabinets are probably 25 years old, rustic pine in good condition.
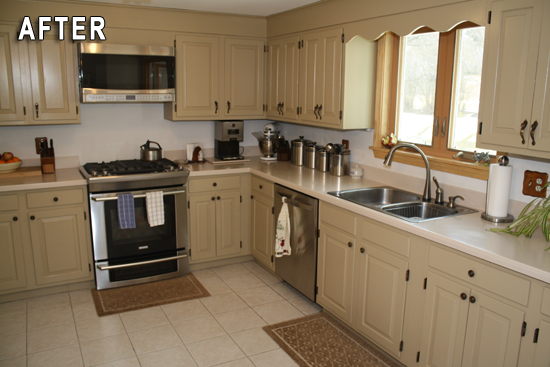
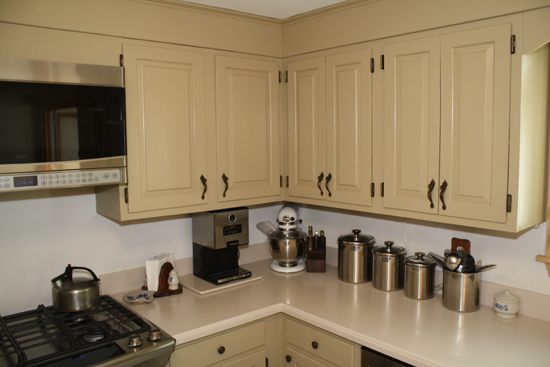
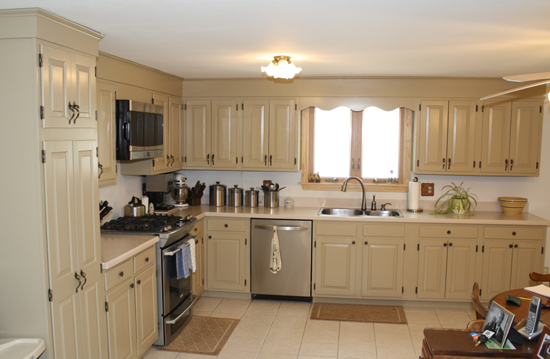
The next photo is the dramatic change that this kitchen went through with the Rust-Oleum Cabinet Transformations product. I think the pictures in this article will speak for themselves as far as how dramatically you can change an older kitchen by painting the cabinets.
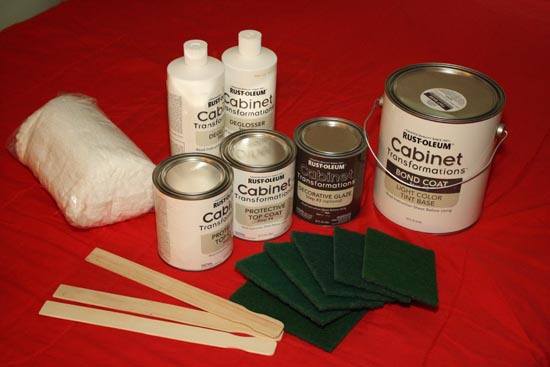
Like most every DIY project preparation is the key to success. That’s where Rust-Oleum has really shined with this product line. They have taken all the guess work out and provided all the basic materials you’ll need to successfully transform your old kitchen cabinets into a fresh new look.
As you can see above the kit we used included all kinds of products including:
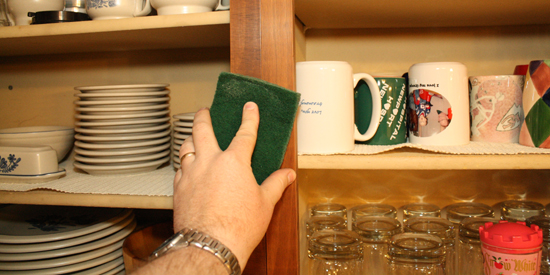
Preparing to paint your cabinets is really easy when you follow the directions that come with your kit. Before you start get organized and plan on spending ten to twelve hours for an average size kitchen. The first step is removing the doors and cabinet hardware. I suggest you number each door and put the hardware from each door in a marked bag similar to what we did shown in the picture above. You can take off drawer hardware and simply put it in the drawer so it doesn’t get lost.
Next you’ll need to clean all the cabinet surfaces with soap and water. Following that will be the application of the deglosser. As you can see above the deglosser is applied with the green scouring pads that come with the kit. You simply rub all the surfaces with the pad and continue to put deglosser on the pad as you go.
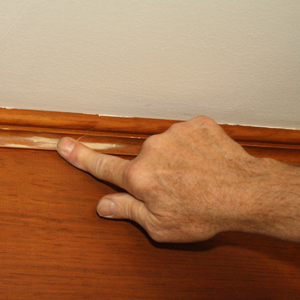
Once the cabinets are cleaned and deglossed I recommend you take the time to do any minor repairs such as filling nail holes, repairing small dents, dings and things of that nature. We used wood filler and latex caulking to “tune” up all the joints and moldings before painting.
Before you paint be sure to go back and lightly sand any repairs so that the finished surface is smooth and ready for painting. If you do sand repairs you’ll need to clean those surfaces again to be sure there’s no dust or debris left on the surface.
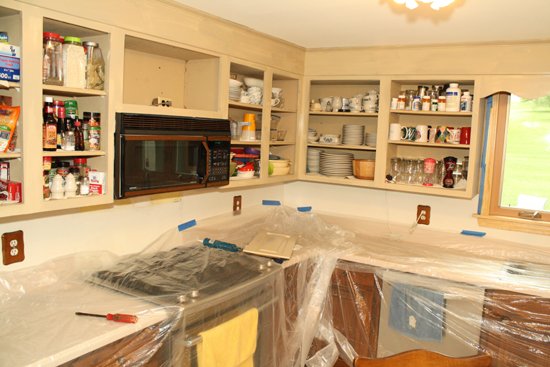
One last tip and you’ll be ready to paint. It’s really important to protect the appliances and other finishes as you paint. I recommend you cover areas that are not being painted to protect them. Lastly, you should paint the upper cabinets first just as we did in the photo above. This way any drips that might happen won’t be on top of newly painted cabinets, any bumps from ladders won’t be on new cabinets, etc.
I’m not going to show you how to paint as most people have that down pretty good. I’m just going to talk about the results. I’ve been painting for the better part of 25 years. I’ve painted countless cabinets, houses, furniture and everything in between. The key for any project is preparation and exceptional products. Rust-Oleum has packaged their Cabinet Tranformations Kits with everything you need to be successful.
The cabinets in this 25 year old kitchen now look new all over again. Buying new cabinets for a kitchen of this size would cost well over $20,000 with installation. For just a few hundred dollars this kitchen is now ready for another 25 years. Not only does it look great but the quality of the paint surface is excellent. The protective top coat gives it a factory finish appearance and it very durable.
With 70 different color/glaze options available you too can transform your kitchen in just one weekend. Whether you have wood, laminate or melamine cabinets this product will work. I’m 100% satisfied with the results that Rust-Oleum Cabinet Transformations gave us. I think the pictures speak for themselves and this is a product I’d recommend to everyone. For additional information please check out http://www.rustoleumtransformations.com/.
Which is Better a Stick Nailer or Coil Nailer? Framers have many choices in nailers…
Estimating How Many Nails for a New Roof When it comes to estimating materials for…
Composite / PVC Decking Layout Tips and Advice Composite and PVC decking have really changed…
Benefits of ERV Systems (Energy Recovery Ventilator) If you're building a new home or doing…
Vermiculite Attic Insulation If your home was built before 1990 there is a chance it…
Arc Fault (AFCI) Circuit Breakers Tripping Often An arc-fault circuit interrupter (AFCI) or arc-fault detection…
View Comments
What an amazing difference! I was just looking at this product online Friday and thinking about giving it a try for my own kitchen cabinets and I read you can also refinish laminate furniture with it.
Shel - It is an amazing product. I'm a huge fan!!!
If you like Rust-Oleum’s Cabinet Transformations, you are going to LOVE Stainable Primer. This is a new product that makes any surface (cabinets, MDF, PVC, thermofoil, metal, fiberglass and more) stainable.
Unlike Rust-Oleum, Stainable Primer is a single step one-coat process with no special mixing or measuring. No sanding, stripping, deglazing or other special preparation. In addition, you can use ANY oil, water or gel stain (or paint) product on top of the primer.
Stainable Primer contains actual wood, so when you brush or spray it on you are applying a thin layer of wood that can then be treated just like wood. That’s the magic.
Beyond cabinets, Stainable Primer can be used for other great DIY projects, including outdoor PVC furniture, picture frames, planters, and more. You can see a gallery of before/after and project ideas at http://www.stainableprimer.com.
Hi Amy, I am guessing that you likely work for Stainable Primer so I wanted to make a comment. I looked up the product (thank you for the link), however, it is insanely expensive. Almost $50 just for a quart & about $120 for a gallon is astronomical... AND the paint/stain and poly still would need to be purchased. If you do work for them, I would like to suggest the price be dropped drastically. It appears to be a great product, but it isn't the only fish in the sea. The price for this is not justifiable no matter how you wrap it up. Thanks for sharing it tho'. It's always cool to see what else is out there.
It is HORRIBLE, and takes SO LONG.
Unless you have space to do a lot of doors at a time, as well as a place to let them dry, you are going to be waiting days with each coat and application for each group of doors to dry. Note; in their video they do 1 or 2 doors, and an upper cabinet, now multiply that by your kitchen cabinet doors, drawer fronts and boxes and also keep in mind, when you’re doing the lowers boxes you will be on your knees, on a stool, on your rear, just bent over for hours and hours and days…now is when you realize it will take weeks. Once I started, I was committed; I couldn’t just stop, even though I REALLY WANTED TOO, but I had to just keep going. My kitchen, when I finally finished a month later, I initially thought looked better then when I started, but not at all uniform or even close to a “PROFESSIONAL” job even though I followed the instructions to the letter. Unfortunately there is evidence of a heavy, tired hand on my application on some of the doors compared to others, unless you have lots of stamina and don’t mind scrubbing, wiping, brushing and dabbing, bending, twisting and smelling terrible chemicals for HOURS AND HOURS AND DAYS AND WEEKS…. Now for the worst part, even though I followed the instructions meticulously it is not holding up and is chipping around the more heavily used areas of my kitchen.
Before I took this on, I had gotten a estimates from some contractors for about $2000 to $3500 it sounded like a lot, but in hind sight, I now realize what a mistake I made by thinking I can do this for just a few hundred dollars and some elbow grease. BOY WAS I WRONG!
I normally would not take the time to leave a review but I wish to save others my DISAPPOINTMENT I consider myself quite handy, but this was SO MUCH MORE than I imagined. I spent my time, energy and money on this Rustolium product and Transformed it into a bigger ugly problem. Just like you would not paint your car or perform surgery on yourself, this too, is something better left to a pro!
Painting cabinets regardless of the product is a ton of work! Hence why it costs so much money with a professional painter. I've used this product and it's much easier than traditional standing, priming, and painting. That doesn't mean it's an easy task.
Hello Todd -
I recently came across your HCI site. Very comprehensive, indeed. Nice job. I took notice of that Rust-O-Leum product for kitchen cabinets. It looks convenient enough.
I'm quite certain that if I show your article to my wife, it will get added to my 'honey-do' list. The 'before' picture looks a lot like our cabinets. It's nice, but could use some brightening up.
Thanks for the insight. I intend to check back from time to time to see what HCI is up to. :)
Dave C from Homeandgarden911.com
Hi Todd,
Can you use Rustoleumtransformation on pressed wood cabinets.
Thanks Larry
Larry - If can be used on all kinds of cabinets. Check out this: http://cabinets.rustoleumtransformations.com/faqs.php
Great Job Todd! What color did you go with? Also, did you brush the coats on? Thanks.
Biscotti. Yes it's brushed on. Fantastic results and an incredibly durable finish. I'd highly recommend it to anyone.
Love this! We've been contemplating these kits for awhile now. Just out of curiosity, how many kits did you need to finish a kitchen of that size?
Just one kit!! You won't be disappointed.
Hi Todd, sorry to bother you, i have been anxiously waiting to here back from you about the cabinet transformations.You said you used biscotti with no glaze. Is the color creamy looking? my cabinets are maple, with a frost. My cabinets have a pinkish hue to them, never liked. They are in great shape though, so replacing them is not an option.Do you see brush strokes? waiting to hear from you before i purchase this product. Thanks for your time.
Linda,
It's a nice color although the color really depends on the lighting. I'd say it's a creamy color with a VERY slight hint of green in it...but that may just be the room and lighting. The only way to get a smooth finish would be spraying the cabinets. However, the brush strokes are very faint.
Good luck.
Todd
It looks great! Can you please tell me if you used the glaze (over the paint) that comes with the kit? thank you
We didn't use any glaze.
we are putting up new cabinets using oak ,do we prime them first ,we are looking to use your cream color kit ,,,Tks
The Rust-Oleaum kit includes everything you need including a bonding primer.
Todd, I was thinking of redoing the fireplace with Rust-Oleaum.Will the heat affect the paint at all?
I'm not sure, I would call Rust-Oleum and inquire, they have great customer service. Good luck.
Todd,
I now have painted cabinets and I would like to know if this product would make them look stained, tired of the paint for sure
It's really a paint..not a stain.